Translate

Showing posts with label Thoughts. Show all posts

Thursday, July 18, 2013

Fun and Inspiration with Mary Ellen Hopkins

Back in the early 1980's I was a new quilter. My husband was watching the children while I spent a Saturday at a WQI meeting (Wis Quilters Inc.) At the time, the members had to bring their own lunch to eat between the morning lecture and the afternoon speaker.  This particular meeting, Mary Ellen Hopkins was the speaker for both time slots.  I had no idea what was in store for me that day.

Mary Ellen Hopkins

What a treat, she was a stand up comedienne/quilter.  This was the first day I was ever hit with a big idea, inspiration that kicked off my own colorful quilting career.  Mary Ellen was so funny, her entire talk was lots of fun.  She started to talk about finding a colorful splashy fabric that could be cut up into half squares; arrange the pieces and sew them back together! Just one fabric, not 5, 10 or 20! This is when the inspiration hit.

Only the day before I had been shopping in a local chain store and seen a red, blue and yellow print that I loved, but couldn't figure out what to do with it. You can guess what I did. The very next day, I drove to that store and purchased some of that fabric*.  I set the triangles in a black border and was absolutely thrilled with the result and ready to create another. This quilt led to another, and another, and you get the idea. 
Closeup of a similar quilt, using one fabric and sewing it together.

Mary Ellen has recently died.  She taught, lectured, and wrote books and articles that entertained and inspired quilters around the world.  I was one of them.  Thanks Mary Ellen.

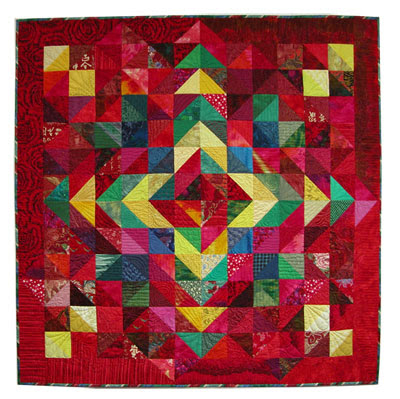
Symphony of Color by Ann Fahl
*Ann no longer has the quilt that was inspired this day.  It was called "Fun with Triangles."  There is no photo of it, but it is in the collection of Wheaton Franciscan Hospital in Racine.  The fabric scraps, if there were any, were all cut up into triangles and used up! Some of Ann's more recent triangle pieces can be seen on her website. Half squares will always be an important part of her quilts.

Friday, December 14, 2012

The Cat Hair Returns

Do you remember the first quilt show you ever attended? Or, the first show you ever entered?

My very first quilt was a blue sampler that I made for my mother. It was a large one, full sized and hand quilted. I entered it in the state historical society show, and won an honorable mention in 1979.  It was really exciting to get a ribbon on my first quilt.
Ann's very first quilt completed in 1978

At the time, I knew nothing about quilt shows, I'd never even been to one!  But the judge made a comment on the back of the ribbon that said, "Pet hair is distracting."

After that comment I thought to myself, "I guess I'll have to watch that when I enter another quilt in the show!" That was something I never even considered doing.

Eventually, when I had more of a studio to work in, there is a procedure that I follow. I always clean off my cutting table first, lay out the quilt, and go over it with a lint roller front and back.  This has always seemed to work.  I always mention that first judge's comments in all my lectures with good humor; in the hopes that it might convince others to check over a quilt carefully before going to a show, or be given as a gift.

Every time a quilt comes home after a show, I open up the box and admire it, and hang it up in my living room. Nine out of ten times my quilt will come back with little threads on it, that were probably from someone else's quilt!  How do I know that?  It's because the threads are always the wrong colors for the fabrics I used. Many times I wonder what famous persons' quilt they came from.  Had they touched?  Did they get to be friends?  Where do all these threads come from?  Do other people find them on their returned quilts too? This is truly one of life's mysteries.
Garden of the Sun God, (c) 2012 Ann Fahl

Late November, my beautiful Garden of the Sun God quilt came back from the IQA show in Houston. It looked beautiful when I opened it up. After finding the judges comment sheets, I sat down to look them over carefully.  (This can be either a very trying experience or a pleasant one.) Their comments were OK this time, but one of the judges took the time to write at the bottom, that I should use a lint brush to remove the pet hairs from the dark areas of my quilt!!! I had to laugh. Like other pet owners, I make an attempt to limit the cat hair in the house, but there is only so much I can do. I looked over the quilt, and I didn't see any Oreo hairs, but perhaps I have selective vision.

Here is Oreo helping to fold up a quilt.  Could this be the problem?

So I have come full circle in my quilting life.  The first quilt I ever entered in a show had cat hair on it; and the best one I've made to date--also had cat hair on it. And, probably the hundreds of quilts I have made in between also had cat hair on them. What can I say?  I do my best.

I hope this brought a smile to your day.
Ann Fahl

Friday, December 7, 2012

Fresh Salsa's Finale with Summary

The Border

We're at the end of the project. It's time to quilt the border. Again I have returned to that plan I drew up before all the quilting began. 
Ann's quilting plan for Fresh Salsa
 I doodled lots of things on the page but here's what I did for the border it is done in two parts.
Part one of the border.
I marked a curvy line in the border, dividing it roughly in half; with a silver pencil.  I danced (quilted) this area with leaves, spirals hearts and spirals. Then I went around the outside with some curvy lines that intersect the outside edge. This will make a nice flat edge when I block the piece and trim the edges.
Finished border.
The Binding

I found 4 different fabrics that might work for the binding.  It's always exciting to get to this point, because I know the quilt is almost done.  Put some careful thought into your fabric choice, because this is like a frame on a painting. Think of it as the sparkle on the edge. When you look at your top, do you want a contrasting edge or a subtle edge?  For me, it depends on the quilt and my mood at the time.  For more info on bias binding, may I recommend my booklet on binding.  You may think differently about it after reading the 28 pages that I've written. 
Here are the fabrics I though might work for the binding.
So which fabric won?  I thought it would be the green check on the left! The red/pink/yellow multi was too busy.The green/blue/red stripe was a decorator chintz looked great. I went out and purchased the small stripe on the right.  It had a sense of humor and pulled out all the colors in the top, but when placed on the quilt itself it was more pastel than I wanted.  So the winner is........the green decorator chintz.
Fresh Salsa, ©2012, finished and bound, 50 x 50 inches

Review:  hints for successfully quilting a pieced quilt top
  • Always make a sample of machine stitching every time you have re-threaded the machine or changed something.
  • Use the correct needle.  I prefer a topstitch needle.
  • Find the darning foot that works best for you. You need good visibility and it must ride high enough to clear the thick areas where the seams meet.
  • Reduce pressure adjustment on the pressure foot, check owner's manual for it's location.  I reduce the pressure to 0 on my machine.
  • Darning feet do wear out.  If it squeaks you might lubricate the foot with a dot of sewers aid. With a small brush, remove excess lint which may be clogging the spring. If you've used the foot for a long time, it may be time to get a new one.
  • Adjust the darning foot so it rides higher by using the wheel on the attachment, by bending the thin bar on top, or using Diane's method of adding an "0" ring to raise it up.
  • Wear quilter's gloves to give good control of the quilt under the darning foot. 
  • A SewSlip creates a smooth slippery surface for easy movement of the quilt on the bed of the machine. If you haven't tried one, they are worth the price.

Happy piecing and quilting
 Ann Fahl 


Friday, November 30, 2012

Quilting Fresh Salsa! part 1

Let the quilting begin.....................................................

Here is my sample flaming spiral.  I don't make pretty samples this is really how I work. Did you want glamour?
Let me tell you this quilt has been a challenge from beginning to end. Beginning in the center, I have planned on quilting a flaming spiral with red thread in the center.  Just to make sure, I practice on a sample first.

The actual flaming spiral in the center of the quilt. I like how the thread subtly blends with all the fabrics
The plan is to work from the center out.  I have taped my paper plan to my sewing table so I can refer to it as I move out to the next row.  This feels very much like following a cross stitch diagram or knitting pattern. So I continue to make small samples, change thread color where needed and keep moving outward.
Here is one of the first yellow arrow segments just outside of red center.
Quilting the yellow arrow segments began with a challenge. I wanted to try quilting it with the red thread, and after sewing one leaf, I realized the error of my plan.  The yellow variegated thread really worked the best.  Notice how it subtly emphasizes the leaves in the quilting pattern. I did the same thing in all four arrow segments.
Detail of dark variegated thread on the green triangles.
I worked around the next ring around the quilt, using yellow and red threads.  Then I got a chance to use the dark variegated thread on the green segment. I was very pleased with how it looked. It took quite some time to quilt my way out to the outer edges of the quilt.  I took my time, stopping for the day when I got tired.

I have found that when I quilt for extended periods of time I start to make mistakes and bad choices.  Since there is no deadline on this quilt, I can just take my time. This is a very relaxing way to quilt.

Along the way, I found that the darning foot was catching on the spots were all the seams come together. Since I have reached my limit of blog space, please see part 2.  Continue to scroll down.
Ann Fahl


Quilting Fresh Salsa part 2


Darning feet for Janome, the center metal foot is adjustable.
One of the monumental challenges I faced is what happens when the machine gets to an area where many seams cross. The foot would get caught on the "lump" and not move.  Then when I tried to force it I'd get a few huge stitches, which didn't look very good.

My goal is to create as even a stitch as possible. It stumped me for a little bit, and I realized why many quilters send their tops out to be quilted! Then I remembered that I could adjust my darning foot. (See image above, the center metal foot.)  All I had to do was spin the little wheel above the needle bar until the foot was high enough to just skim over the lumps.  It took awhile, but I found the correct level. For a complete blog on darning feet check out my earlier blog. For Bernina owners, Diane Gaudynski has a method to alter their darning feet check out her blog to read about this.


Altering the darning foot. If you have the above, clear style darning foot, many people find that it drags above the throat plate, even if the pressure on the foot has been reduced to zero.  This isn't a manufactured recommended procedure but it works:
  • Remove the foot from the machine and slightly bend the little bar down (area shown below the arrow).
  • To do this, turn the foot upside down, and firmly press the bar onto the edge of a table or something substantial to do the bending. Bend it just a little.  You will feel it "give."
  • Do be careful, as you can damage the surface of the table when doing this. Your are responsible, not me.
  • Re-attach the foot on the machine, if it is still dragging, remove and bend it a little bit more.
So much for darning feet, let's get back to the quilting.  I completed the center quilting by continually consulting my plan as shown in blog "Machine Quilting Fresh Salsa." This wasn't the fastest quilting job I've ever done, but I followed the map and finally reached  my destination.

Now it's time to quilt the border. How in the world am I going to quilt it?

Ann Fahl

Friday, November 23, 2012

Variegated Thread with Fresh Salsa?

My three choices for thread in the red areas of the quilt Fresh Salsa.

You may think that selecting thread for a quilting project is a small thing, but it's more important than you think.  It pays off when you make the right selection. So now I've got this top that is a cacophony of red, green and yellow, what thread should I choose?

One of my issues with sending your top out to someone else to quilt is that you usually get one color of thread for the quilting. This would make my quilts so boring! Mattress pads are quilted with white thread, how exciting is that? I choose to use multiple threads, usually depending on the color of the fabric where it will be used. No mattress pads for me.

Learn to machine quilt so you can finish your quilt in the manner you choose!  You can do it!

Auditioning the thread. This is shown using white paper just for illustration. It should actually be done on the fabric of your choice.
 Back to Choosing Thread:

  • Pull out all the colors you think might work.
  • Audition them by unreeling about 36 inches of thread and letting it puddle on the project.
  • Give each thread a rating:  yes, no, maybe.
  • Give a second look to the yes and maybe threads, I throw the ones I like best into a basket or bowl, so they are accessible when the quilting begins.
  • If unsure whether to use thread A or B, sew up a little sample of both; hold each sample up to the quilt top, and this should help you make your decision.
  • There is nothing worse than having to rip out lots of machine quilting, after you figure out, you should have used another thread! I have lots of personal experience in this area.
Solid color or Variegated? This is a personal question. Most of the time I prefer to use variegated threads when I quilt. It makes the stitching more exciting on solid color or mottled fabrics. But if you are using prints a solid color thread may be a better choice.  Audition both types of threads to see which you like best.

Contrasting or Matching thread?  Here are some tips I have learned over the years.
  • Matching thread will be less visible, and will hide irregularities in the quilting.
  • Contrasting thread will really accent the quilting, look great from a distance, but will show everything little booboo.
  • A slightly richer color will subtly enhance the quilting without being too distracting.
  • Lighter threads on deep fabric will usually look good.
  • Dark threads on light fabric are very challenging, all the mistakes will show.
  • The choices are up to you.
Rainbow variegated threads, # 851, 814, 844 from Superior Threads
I have chosen three threads to use on my quilt, most are subtle contrasts with the rich colors in the quilt top. The yellow will look great on the small yellow areas of the quilt, because it mixes several yellow tones there will be subtle contrasts and matching colors here. The red thread includes red, purple, and gold, this makes the red areas more exciting. The darker rainbow thread looks great on all dark fabrics and will make the green areas richer on this quilt top.

The quilting will begin next.

Ann Fahl

Friday, November 9, 2012

Quilt Judge on a Soap Box


Not too long ago, I was one of a panel of judges for a lovely quilt show, in a modest sized midwestern town.  Some of the work was outstanding; there was quite a bit of hand applique, a few hand quilted pieces, some amazing pieced work, a few were absolutely masterfully made, yet there were only 5 entries that were original designs!


Pardon me while I pull out my soap box one more time after a quilt exhibit.......... What has happened to us as quilters? Quilting has enjoyed a great resurgence of interest since about 1976--the bicentennial year. Have we still not learned enough about our art/craft to create more original work? Perhaps quilting has become more of a money making business rather than an art.  There are businesses creating books and patterns, tv shows, tool manufacturers, big exhibitions and contests, there are websites and workshops to teach new ideas,  and the list goes on and on........
We can cut out all the pieces for a quilt by cranking a machine, we don't need scissors and rotary cutters. We can sit at a sewing machine, and let it do the stitching for us.  If we create a top, we send it out to be quilted. Somewhere we have lost the joy and satisfaction of creating our own work.  I think you get the idea.
Everyone is trying to sell something!
Each time I finish a quilt, whether large or small, I feel a great sense of satisfaction in creating something that is truly my own. The process of making a quilt is similar to a treasure hunt. I begin with a small idea, and I keep working on a design wall, until pleased with its composition and appearance.  Yes, it takes time to create something that is your own. Most of the time I never know what the final project will look like until it's done.  Why use a pattern, you already know what the finished product will look like?  Where is the surprise?

Ann almost feels like a queen when she finishes a new project, she feels so proud.

Yes, we all have different talents and skills.  Let me challenge all of my readers to try to add something original to each project you begin.  You may be surprised to find you have the skills to create more than you think. You will become more confident in yourself.  Sometimes this path will put some obstacles in your way, it isn't always easy. Remember that the quilting community is one of the most helpful and supportive group of people in the world.  Ask for assistance and you will find many suggestions and possible solutions. After a few projects your skill and idea bank will grow.

Please give this a try. As a community we need to rediscover our creativity.  It's in there, we just need to let it grow.

Ann Fahl

Thursday, February 16, 2012

When Your Sewing Machine goes on Vacation!

Last week my sewing machine started making little birds nests on the top side of my embroidery.  For days I tried to figure out why this was happening.  What was I doing wrong? What could I change so this would stop?

Nothing seemed to work.  So my machine went in for repair. This is the machine that I use for all of my free-motion work. What was I going to do while it was gone?  

I decided to clean out the closet where I store all my extra office supplies, photography, and stuff. It's probably been 25 years since I've done anything with the closet! You can imagine the state of confusion it is in. So what am I waiting for?  I unloaded the whole closet then the sorting began.  I'd been stuffing things in this closet and closing the door really fast.

Only a portion of the dusty slide boxes and notebooks

All those slides, they'll have to be sorted and mostly thrown out.. Because I am spending lots of time on my family history I need a place to store all my large notebooks and files. Today was recycling day, and you should see the huge load of old papers, magazines and junk we set on the curb!


After replacing two of the sagging shelves I began putting all my notebooks and supplies back in. This little task seemed to take forever, but it is great that it's done.
Look not at the beauty and organization, be impressed with the remaining space!

It's not my idea of a vacation, but it really feels good have space again and all my genealogy notebooks will occupy my top two new shelves. The extra surprise was I found all kinds of little surprises. A brand new pair of little Gingher scissors, a photo of my son with his first remote control airplane and a half yard of beautiful tapestry. 
Included in the treasures found were: my childhood animal collection,
new pair of Gingher's and a large hunk of a beautiful tapestry
Enough cleaning and organization.  I'm going to pick up my machine and finish up a really beautiful quilt for Houston.  Bye.

Ann Fahl

Tuesday, January 10, 2012

On the Front Porch--My Journal of Terror

January 9, 2012

To think, this morning I didn't have any idea of what to blog about! Things have changed.
Fall Fun
The drama begins............

My complete show from the La Conner Museum, was to arrive this morning, in 8 boxes.  I waited all day, and no quilts.  So at 5:30 pm, I tracked one of them and found that they were left on a front porch at house with the same number, but on the wrong street.  Terror almost stopped my heart. I tracked the remaining 7 boxes, and they were all delivered to the same incorrect address.
Hairy Homage
 I called UPS, and they found that they did indeed deliver them to the wrong address. By this time my voice was shaky.  Candace  was very calm and said she would work on this right away, and someone would call me back within the hour. In the meantime, I got in my car, drove several blocks away, and looked at everyone's front porches, but  it's 8 hours later, and it is dark outside. I talked to several people that were walking dogs and one lady that gets lots of deliveries, but no one knew anything about my 8 boxes.
In the Black Eyed Susans
 All I can think is that my body of work is sitting on somebody's front porch.  Would it be stolen?  Where was it? Thank goodness it didn't rain or snow.

As I pulled into my driveway from my personal search, my husband was standing at the front door talking on the phone.  This time it was Glen at my local UPS delivery hub.  He told me they had already picked up the packages, and would be delivered the next day. I didn't really believe him, as I had found there was no such address over on the incorrect street.
Coneflower Fiesta, my featured quilt at the exhibit
Glen called back a few minutes later and said my shipment had arrived and had already been loaded onto the truck that would deliver the boxes tomorrow, hopefully to my address. He had spoken with the driver that had picked up and returned the boxes to their depot.  So, all I can do now, is relax and hope for the best. Did I say "rest?"  
End of the Day
 It's going to be a long night until the quilts arrive.  Keep your fingers crossed.

January 20, 2012

I didn't sleep too badly last night.  I've tracked my packages, some say they've been delivered, some say they are back on a truck for delivery, so I trust what Glen said last night, that the packages will be redelivered. I've planned my activities for the morning, so that I will be able to hear the doorbell ring when that wonderful UPS man arrives!

I'm cutting several hanging rods for my show that opens at the Anderson Art Center on Jan 29.  As I drill the last hole in the end of the last rod I hear the door bell ring.

The drama concludes.........

It's 8:36 am the UPS man has delivered the 8 long boxes.  I am so relieved.  I have learned several things from this "opportunity for learning."  I will share those with you next time.


Ann Fahl


!!!!!!!!!!!!!!!!!!!!!!!!!!!!!!!!!!!!!


Tuesday, January 3, 2012

New Year's Resolutions for Quilters

The big question this time of year, is "What are your New Year's resolutions?"  When reading what one quilter said, it was something to the effect that she was going to finish all her unfinished projects. All I can say is:

Stop that kind of thinking right now!

In my first 10 years of being a quilter, I struggled to finish all those little blocks and projects that were learning exercises.  I spent hours finishing a hand stitched stained glass block!  And for what?  Just so I could say it was finished?  I was wasting my time, I could have been doing something else.

If you've been an artist or a quilter for quite a while, and a project isn't working, put it away. A very famous quilter once told me something that helps me when this occurs.  Caryl Bryer Fallert told me that "Not all projects were meant to be finished."  And with that little phrase she was so right.  Sometimes we need to try something, and if we don't like that technique, or it didn't turn out the way we had hoped, put it in an unmarked brown bag and drop it off at Goodwill.  Or put it in a white elephant exchange at your quilt guild.  You have still learned something from that project, even if it is just, "I"ll never do that again." Get it out of your life, and move on to something that makes you feel good. Or at the very least, cut it up, and sew it together in a different way.

Some projects are worth the struggle to completion. Workshop samples are not. Waaaay back at a time when I was making windows of my quilts, I made a yellow pieced background and scattered metallic scraps like confetti thrown up into the air.  The blocks were set in a cream and yellow decorator print that was very pricy, I hated to even cut into the fabric.  The finished top was such a disappointment to me, I brought it to my critique group, they agreed that it needed something, there was quite a discussion about trying this and that.  In the end, it was the above mentioned Caryl who looked at me and said, "You need to cut it up and set it together in a different way."  At the moment, the thought was too horrible to consider, but on my 1.5 hour drive home, I realized she was right.  My plan was formulated by the time I got to my front door; I would set the blocks in black. And wow.  It is a great quilt!  
Confetti Celebration, the finished quilt, (c) 1991
You will have to make your own resolutions, maybe they should be to work on projects that are important to you or to make the best use of your limited time.

In 1976 in America, we experienced a resurgence in the art of quilt making.  People were cleaning out their attics and finding old quilt tops everywhere. All I can say is, if you have your grandmother's flower garden quilt top neatly folded, in a box lined with tissue paper; there was a reason grandma didn't finish it.  She had already learned this lesson.

Throw some confetti up into the air, and don't vacuum it up!

Happy Quilting New Year,

Ann Fahl

Saturday, December 31, 2011

It's Party Central at My House!


Party Girl, a quilt by Ann Fahl
We never go out for New Year's Eve any more.  I prefer sitting down with a Diet Coke with fresh lime and watch a good movie.  Oreo however likes to celebrate in a much more active fashion.  This quilt was made in 2002 when her favorite "doll" was much more attractive and the little plastic balls are scattered all over the floor.  She will party with some catnip this evening. 

Here's how the doll "appears" in the quilt.
Being conservative, we always keep our celebrations small and not too boisterous! Here is Oreo's doll.  Don't let this happen to you! 

This is her "fav" doll as it exists 2011.  It's kind of a mess, but she loves it.

Happy New Year.
Ann Fahl


Tuesday, November 22, 2011

It's a Glamorous Life


Recently I got back from a teaching trip in Monterey CA. They treated me very well there, and I had an enjoyable time. The students were amazing, I am proud of the work they accomplished in the 2 day workshop.  There were two highlights for me personally; I stayed with Dave and Sally who were wonderful hosts, they had a magnificent garden. Two, I took a beautiful drive down the Pacific coast on Hwy 1.  Rita and Stan were my tour guides. Here are some of the highlights.
Shore view with natural archway, it was a beautiful day.

Looking in the other direction the mist creates a mysterious view of the mountains in the distance


A hillside view of the succulent garden at the home of my hosts.  What a rich assortment of plantlife I rarely see in WI

This garden had multiple levels, these stairs lead to a view of a small canyon behind the house.

Upon my return home, a combination of events occurred and I decided to paint my studio. This is a job that is long overdue. I ripped off the dark paneling, patched, scraped and primed and textured the walls. There is probably about a week's worth of work remaining. Sometimes it is good to take time off from quilting designing and blogging. I'll get back to those things. This is just another part of my glamorous life as a quilt artist and teacher.
Here is the artist disguised as a house painter!
 Here I am dressed for a day of painting and patching, wishing you a Happy Thanksgiving.

Ann Fahl

Wednesday, September 28, 2011

What's a new Ezine #001?


A group of 16 textile artists have been working hard for some time, coming up with ideas for original work. They began a blog in Jan 2011 called The Sketchbook Challenge. They have now combined their ideas in a magazine format, that is available for purchase.You print it at home, and they even give you instructions for binding it, if you desire.

I have just looked over the first issue. 13 of the artists have contributed to issue # 001. There is a wealth of color, art, ideas and information to peruse.  The artful look is a little different than most how-to magazines which makes it fresh and freewheeling. Each article carries the essence of the individual author and delights you with color and ideas.  There will be something in every issue that you will find of interest.  It will stretch your creative muscles.  Mine need stretching!  There are 83 pages, larger and more idea-packed than I expected.

The articles include:
  • How to Draw a Pinecone by Jane La Fazio
  • Make a Sketchbook Sleeve by Sue Bleiweiss
  • Remedies for Blank Pages by Carol Sloan
  • Take your Pencil Out to Eat by Susan R. Sorrell
  • and the list goes on and on.  Here is the link where you can check it out yourself:  Ezine #001 to look inside the issue and order.
Do not let the plain brown wrapper/cover deter you from opening these magical pages. There is something wonderful inside waiting for you. Read Lyric Kinard's piece on Making Bad Art. I've made alot of what she is suggesting, but she encourages the reader to keep working!

Let me know how you like it.

Ann Fahl

Friday, September 2, 2011

Eureka! A New Favorite Variegated!

Close up of quilting with YLI Variations #21V
 I'm still working on the same new table runner pattern.  I am quilting the soft cream mottled background with a YLI Variegated thread I purchased in NC a few months ago.  For years I have hoped to find a soft variegated thread that would be appropriate for fabrics which were soft neutral colors; muslin would be an example.  And there was a small cone of sand #21V sitting on the table in the YLI booth at the show. It was mine! How could I have missed this color combination?
 
I've been quilting with it for 2 days now, and it is exactly what I wanted.  Because it is subtle, I don't know if the photos will really show how great it is, but I'll show you anyhow.

This thread is a tri-lobal polyester thread, which is stitching on my machine like a dream, it is on a thread stand and it unreels smoothly with no problems. This isn't the shiniest thread on the market, but it does have a nice sheen to help emphasize the stitching. I am using The Bottom Line thread in the bobbin and a Titanium topstitch needle size 14. There is a Fairfield Soft Touch batting in the sandwich. I need something that isn't too puffy and is absorbent for use on the table.
Another closeup of the quilting
It's fun to find a thread that works well.  I've used YLI's Variations thread before, but never had this particular color in my collection. Now I do!

Hope all of you have a variegated holiday weekend.

Ann

Thursday, May 26, 2011

Trillium in Technicolor and Problem Solving

Trillium in Technicolor as seen in my book Dancing with Thread
This post will show you how I have spent the last week or so.  I will also share several tips I've learned along the way. Obvious yes, but they are worth mentioning.  This is enough information to fill a half day workshop!

Trillium in Technicolor is a quilt I was very proud of. There were several new things that I tried and they were successful.  However, something has always bothered me about the quilt.  

So here is the big tip: I hung the quilt up in my bedroom where I would see it first thing in the morning and last thing at night.  After several weeks I figured out the problem,  the largest flower was bright orange and it always seemed to scream at me.  The solution was to change the flower.  Am I crazy? I finished this quilt 2 years ago, why am I fooling with it now? Well, I'd like to show a grouping of trillium pieces in my autumn show at the LaConner Quilt Museum.

I knew the replaced flower had to be in the pink or rose color family, it would blend better with the remaining flowers.
Auditioning soft pink fabric:  not too bad, maybe I like it!
Auditioning deeper rose fabric:  I like this better!

Parchment pattern piece on lower right petal
I had to think about how I was going to do this and work up enthusiasm for the project. With pencil, I traced the three petals onto parchment paper. I added a generous 1/4 inch seam allowance for turning the edges under. Perhaps I'm old fashioned, but I cut out most of my images using scissors. These petals have wavy edges and I think it works better. I cut out the rose fabric for this first petal and began to see a transformation.
The first rose petal is hand appliqued into position. I also added a light pink edge on one side.
 Using tiny hand stitches, and matching rose colored thread, I used the needle turn applique technique, and stitched right up to the dark leaves. I am really pleased with the results. It did take all evening to do this.
On the second evening, I cut out and appliqued the second petal

I am encouraged as I like the pink, but I still seem to see it as an orange flower!
All three petals are appliqued into place.

I hung the quilt in my studio all day so I could admire my new pink trillium.  It is good. With a steam iron I lightly steamed the flower to make the edges flat.  Now, how am I going to quilt this thing?

Using one of the parchment pattern pieces I doodled some designs that would be effective and similar to the quilting patterns used on the smaller flowers. There were two different Rainbow Variegated Threads that worked with the rose color:  I chose #814 because it added more depth to the quilting.

First I worked up my confidence level, then I began to quilt. It really didn't take too long, even though I took my time, this is the LAST chance for this Trillium.
Detail show of the new and improved rose colored trillium
I'm very pleased with the changes I have made.  Even after all this time, I feel the flower has more detail than the original orange. The light pink edges give the quilt more depth and realism.  Even the quilting is better because I took more time to develop a design for it. I have no idea what I was thinking when I fused the Orange one on in the first place.

So here is the completed quilt, I'm looking at it right now, as I am writing this. It is successful, the colors work well together, and I'm thrilled with how all the quilting patterns have formed a cohesive whole.

Trillium in Technicolor an original quilt by Ann Fahl
Yes I made the changes by hand. This was done because I had so many curvy edges to cover.  I could have maybe fused the fabric down, but I didn't want to flatten the quilt. The final quilting was done on the machine and unless you read my quilt statement about the quilt, no one would ever know that the quilt was altered! I admit. I did a good job. Go to my website to read more about the quilt and see larger images.

This method will work for you, if you ever find yourself in a similar situation!  Be calm, take your time, think the solution through, maybe even making a test sample first. Wearing a bright colored pair of socks will always make you feel better and get you in the mood for "quilt improvement."

If you have a problem quilt, put somewhere you can see it all the time.  Eventually the answer will come to you. Then you can decide whether to make changes or not--that's up to you. You have put so many hours into your work, it would be a shame to stuff it into a closet and try and forget about it! Maybe there is a simple solution that will improve the quilt.

Have a rose filled holiday weekend.

Ann Fahl