Translate

Showing posts with label piecing. Show all posts

Friday, December 7, 2012

Fresh Salsa's Finale with Summary

The Border

We're at the end of the project. It's time to quilt the border. Again I have returned to that plan I drew up before all the quilting began. 
Ann's quilting plan for Fresh Salsa
 I doodled lots of things on the page but here's what I did for the border it is done in two parts.
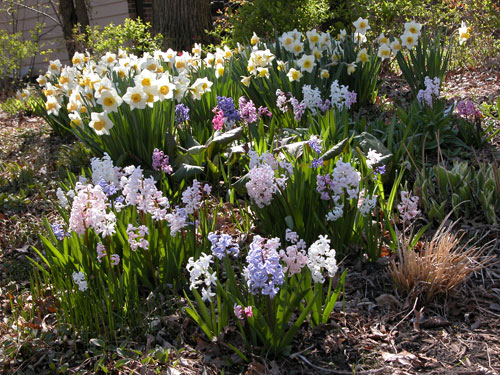
Part one of the border.
I marked a curvy line in the border, dividing it roughly in half; with a silver pencil.  I danced (quilted) this area with leaves, spirals hearts and spirals. Then I went around the outside with some curvy lines that intersect the outside edge. This will make a nice flat edge when I block the piece and trim the edges.
Finished border.
The Binding

I found 4 different fabrics that might work for the binding.  It's always exciting to get to this point, because I know the quilt is almost done.  Put some careful thought into your fabric choice, because this is like a frame on a painting. Think of it as the sparkle on the edge. When you look at your top, do you want a contrasting edge or a subtle edge?  For me, it depends on the quilt and my mood at the time.  For more info on bias binding, may I recommend my booklet on binding.  You may think differently about it after reading the 28 pages that I've written. 
Here are the fabrics I though might work for the binding.
So which fabric won?  I thought it would be the green check on the left! The red/pink/yellow multi was too busy.The green/blue/red stripe was a decorator chintz looked great. I went out and purchased the small stripe on the right.  It had a sense of humor and pulled out all the colors in the top, but when placed on the quilt itself it was more pastel than I wanted.  So the winner is........the green decorator chintz.
Fresh Salsa, ©2012, finished and bound, 50 x 50 inches

Review:  hints for successfully quilting a pieced quilt top
  • Always make a sample of machine stitching every time you have re-threaded the machine or changed something.
  • Use the correct needle.  I prefer a topstitch needle.
  • Find the darning foot that works best for you. You need good visibility and it must ride high enough to clear the thick areas where the seams meet.
  • Reduce pressure adjustment on the pressure foot, check owner's manual for it's location.  I reduce the pressure to 0 on my machine.
  • Darning feet do wear out.  If it squeaks you might lubricate the foot with a dot of sewers aid. With a small brush, remove excess lint which may be clogging the spring. If you've used the foot for a long time, it may be time to get a new one.
  • Adjust the darning foot so it rides higher by using the wheel on the attachment, by bending the thin bar on top, or using Diane's method of adding an "0" ring to raise it up.
  • Wear quilter's gloves to give good control of the quilt under the darning foot. 
  • A SewSlip creates a smooth slippery surface for easy movement of the quilt on the bed of the machine. If you haven't tried one, they are worth the price.

Happy piecing and quilting
 Ann Fahl 


Friday, November 30, 2012

Quilting Fresh Salsa part 2


Darning feet for Janome, the center metal foot is adjustable.
One of the monumental challenges I faced is what happens when the machine gets to an area where many seams cross. The foot would get caught on the "lump" and not move.  Then when I tried to force it I'd get a few huge stitches, which didn't look very good.

My goal is to create as even a stitch as possible. It stumped me for a little bit, and I realized why many quilters send their tops out to be quilted! Then I remembered that I could adjust my darning foot. (See image above, the center metal foot.)  All I had to do was spin the little wheel above the needle bar until the foot was high enough to just skim over the lumps.  It took awhile, but I found the correct level. For a complete blog on darning feet check out my earlier blog. For Bernina owners, Diane Gaudynski has a method to alter their darning feet check out her blog to read about this.


Altering the darning foot. If you have the above, clear style darning foot, many people find that it drags above the throat plate, even if the pressure on the foot has been reduced to zero.  This isn't a manufactured recommended procedure but it works:
  • Remove the foot from the machine and slightly bend the little bar down (area shown below the arrow).
  • To do this, turn the foot upside down, and firmly press the bar onto the edge of a table or something substantial to do the bending. Bend it just a little.  You will feel it "give."
  • Do be careful, as you can damage the surface of the table when doing this. Your are responsible, not me.
  • Re-attach the foot on the machine, if it is still dragging, remove and bend it a little bit more.
So much for darning feet, let's get back to the quilting.  I completed the center quilting by continually consulting my plan as shown in blog "Machine Quilting Fresh Salsa." This wasn't the fastest quilting job I've ever done, but I followed the map and finally reached  my destination.

Now it's time to quilt the border. How in the world am I going to quilt it?

Ann Fahl

Friday, September 14, 2012

Garden of the Sun God


It is time to introduce to you my latest quilt, completed this past spring.  You can visit it at Houston if you go to the big show in October.

At the time of its creation, my teaching schedule had slowed down considerably, so I had more relaxed embroidery and quilting time with this large quilt. It was a joy to make.  I did envision how this quilt to should go together, the background is 4 basic pieces, a little different from my usual style, but similar in feel to Egyptian Garden II.

The working title for this new quilt was Egyptian Water Garden III. The plan was to paint a large panel of fabric which would be divided into 3 thin strips for the background. I always cut the white base fabric a little larger than needed, to give myself some options in how to trim it up for the quilt. So I used about 1.5 yards of "prepared for dying" white cotton.  I poured and dribbled lots of sky blue stuff on the top and browns, greens and yellows for the lower edge.  I twist up the fabric into a long log so the Setacolor paints intermix in interesting patterns.

This is the hand painted panel, pressed, sliced into 3 sections, auditioning a sashing strip.
I envisioned a water garden, with papyrus, pink coneflowers, and a blue heron fishing in a lily pond. So above you see the very beginning! Remember, this will have an ancient Egyptian feel to it, but I created most of symbols to make it mine!

The sashing strips were cut from a rich hand dyed fabric by Dagmar Plenk of Milwaukee. It was a luscious fabric blending red, gold and rust dyes. It made me think of very hot desert when I saw it for the first time. Above the shorter center panel I will place the symbol of the Egyptian sun god.
The strips are pieced with the red sashing. The lower dark blue strip is being auditioned for the water.
The heron is supposed to be fishing in the pond, and I have decided that the special water fabric I have purchased is too heavy and dark.
Auditioning another lighter turquoise for the strip to become the pond.
This lighter fabric blends and subtly contrasts with the upper section, so I'm much happier with this selection.  Good thing I had it left over from my Orange Coneflower Quilt.

Auditioning red fabrics for outer border.
Now the inner section is complete. All the while I have been working on the background, I have been unsure about what to use for the outer border.  It must harmonize with the inside, yet be heavy enough to hold all the sections together. I'm not there yet.

More border auditions.
It seems that I'm getting closer to a border.  I like the fabric on the lower left that changes from bright red to dark red. This creates an interesting border with some movement; this works well with the water idea.

Tune in next time to view the exciting conclusion.......What will be chosen for the border!

Have a good weekend.

Ann Fahl


Wednesday, April 11, 2012

Ann Becomes Ancient History!

My Great Grandfather, Pascal Kenyon Shaw  1854-1928
This is a day that I never thought would arrive, and it has.  I feel that I must mark this day with a more personal message to you, my readers.  I remember when I was a little girl asking my father, in what year I would be 50 years old.  Fifty was an age that was beyond anything I could possibly comprehend.  I also remember when I was 24 and a good friend of mine was 30, I thought she was ancient!
Ann Fahl, April 11, 2012 a landmark birthday
Today, I can be covered by Medicare and begin receiving Social Security checks.  How could I ever have gotten to this day?  It's mind boggling, how has life gone past so quickly? So in this photo, I am sitting in a pose similar to that of my great grandfather, (but don't you think he was handsome?) but I am certainly having more fun! I'm sitting in front of my newest quilt background, which was pieced today, I'm wearing red socks and shoes.

I've had a lovely day, we had special cookies at coffee this morning, lunch with a friend, it is sunny outside, and tonight we are going out for ice cream. We will have a family celebration with my sons this weekend. But somehow, I feel I should be old today!

On my cutting table, daffodils in a vase by Judy Coates Perez
My studio is cheery and sunny today and my garden is so beautiful.
Doronica, a shade loving plant is blooming much earlier this year.  When all the buds open it will be full of bright flowers.
The May Apples are just about open, even though the temperature got to 28 degrees last night.
And look at the hyacinths that are blooming in my front yard.
So this is how my life has been today. The daffodils are still beautiful and I have 3 bouquets in the house, they smell heavenly. 

I was 29 years old for many many years.  Five years ago, I had my 30th birthday, and I've been 30 ever since.  But to be really honest, I'm not 30 anymore.  My son is 30!  I should feel very old today. 

I feel so many conflicting feelings, but to be truthful, I don't feel old.  I've just finished a great quilt; starting another, the master gardener classes have been fun and informative, life is good I don't have any compaints.

Yesterday I took my Silver Mist Toyota Camry in for her 90,000 mile checkup. This was an expensive proposition, with new timing belt, serpentine belt, fluid changes, tires rotated and on and on.  When all was completed, I thought Misty and I could ride off into the sunset together! But I've had a change of heart, we are driving to Paducah together instead.  Hope to see you there.

Ann Fahl
Age 30 years.

Tuesday, December 27, 2011

All those Handmade Gifts!

Here are the 10 tiny notebooks I made for gifts this year.
So, here they are:  I made little notebooks for saving passwords and little treasured thoughts.  I pieced many little sections of things I had left-over from early patchwork projects. Then I used many programmed stitches with a layer of tear away stabilizer underneath for a decorative touch. I put the stitching on the seamlines, in-between, and drew lines to follow with silver pencil.
This green one turned out very well, despite the fact that the strips are on the bias!
After the stitching was complete, I made little book covers out of them. The base notebook I used was small in size; 4.5 x 3.25 inches, narrow ruled, from Office Depot.  They are packaged in packs of 4 and priced reasonably. I folded in the two ends of the book covers, stitched them in place, finished the top and bottom edge, and stuck the little notebook inside. The stuffing part was as much fun as stuffing a big pillow form into a small pillow case.  But it gets done.  It's a one of a kind notebook that the recipient may keep for life! Put a little note inside and sign it.

It makes a neat gift. I hope you have a great holiday.

Ann Fahl

Monday, December 19, 2011

Making Gifts

Here are the strip pieced sections with lots of embroidery.
I've been working for almost a week making ten small gifts.  The project took waaaaaay longer than I thought it should: I've used up lots of little strip pieced sections I've had for years;  played with all the program stitches on my machine; and experimented with some variegated threads, both rayon and metallic. The final result is unique, and the recipients will like them. For me this type of sewing is drudgery!

You will just have to use your imagination. This is all I can show you! Project #1 turned out mediocre, but it helped me tweek the size and order of stitching.  So, I will keep #1 for myself.  #2-10 turned out better, but not perfect. The limited piecing and seaming was done with the titanium topstich needles size 70, and it worked well.  All the parts are now sewn and assembled into a usable item.  After Christmas, I'll post the finished item so you can see what I've been talking about.

I'd love to show you, but I don't want to spoil the surprise for my friends that will be receiving one! Any how, I am thrilled that I am finished with this brilliant idea! In the process of embroidering I tried lots of different programmed stitches, and I found some beautiful new ones! It helped get me in the mood for the holidays, get the shopping done, and prepare the menu for Christmas dinner.  We won't be having tacos this year, it'll be lasagna instead. We're not much for tradition at my house.

My wish is that all of you get all your gifts completed too.  Be sure to sign them.

Almost Merry Holiday to you.

Ann Fahl