Translate

Showing posts with label Variegated thread. Show all posts

Friday, May 31, 2013

Winona on Ice

This is part 2 of a blog about small photo quilts.

After making the two smaller quilts, I printed this larger winter scene in 2 halves and pieced them together, to make a larger quilt for myself. I added two outer borders to frame the scene.  It is called Winona on Ice.
Winona on Ice, a quilted photo by Ann Fahl, © 20 x 15.5 inches
This photo was taken several years ago, and I always wanted to quilt it for myself. This is the view of Winona Lake IN when you first arrive.  Now that the quilt is finished; when I wake each morning, the first thing I see is this quilt! It is the next best thing to actually being at Winona! I like this photo so much that I'm thinking of having it printed on a larger piece of fabric!

Again, using the Bottom Line thread (Superior Thread)  in the top and bobbin, gave me quilted texture without covering up some of the tiny details. It was important for me to carefully detail all the cottages across the lake; as I know most of the people that live in them. I chose a light gray for the sky, but right above the horizon there a subtle orange glow, so I used a soft coral thread for the quilting. If you look closely you will see the shape of a ginkgo leave quilted in the upper right hand corner of the photo and border. So with this fine thread you can achieve interesting effects with machine quilting.

The frozen lake is quilted with light gray. The weeds in the foreground are detailed with Superior Threads # 855 Rainbow thread. It was the perfect choice. This thread is quite a bit heavier, so it gave great ragged texture to all the tall reeds and weeds on the shore nearest the viewer.

Larger photos of the quilt are on my website.

The photo was printed on "Printed Treasures" by Dritz.

After this quilt was completed, I felt sufficiently "warmed up" and ready to tackle a larger design; so I  made  End of the Hockey Season! This was a subject of many blogs.

Ann Fahl

Saturday, April 20, 2013

How Do You Quilt a Hockey Bag? part 6


The time has come to begin all the detailed quilting of my hockey quilt.  I've spent two days outlining all the shapes with monofilament thread. I outline everything using monofilament on top and in the bobbin, with a size 10 titanium topstitch needle. This stabilizes the entire quilt, and reduces the amount of shifting of the fabrics on the wool batting.

Now that the outlining is done,  I can play with the beautiful threads and doodle in the areas between the garden elements. But back to the question; how do you quilt a hockey bag?  This question has never come up before, so I went to my notebook full of quilting ideas and found one idea that would work.
This is the sketch in my quilting design notebook that I chose for the hockey bag.

I keep a notebook (3 ring binder) full of quilting ideas.  So when I need an idea I go to this resource.  This is the sketch of an idea that appealed to me. I used a rich variegated blue thread and it looks great.


I chose a rich blue variegated thread for the quilting on the bag.

Now, how do I quilt a hockey skate?  There is very little space to fill, so I chose a shiny gray thread and began a spiral where the ankle bone pushes out the side of the skate.  I just detailed the rest.

The hockey skate has been embroidered and quilted.

It's time for the sky. So I'm just going to play a little keeping the scale of the curls, coils and loops small.  There is very little space between the hockey sticks and other items to do much quilting.  I chose 2 variegated blue threads to use. The darker for the center and the lighter one for the 2 sides.

Thread choices for quilting the sky.
Here is a closeup of how the coneflowers are detailed and stitched.

Now all that's left is the  grass on the lower edge and the border.  Hmmmm what will I use for the binding? The binding is almost sewn on, here's a peek at how it will look.

Here's a look at the binding and the midnight variegated thread used for quilting the border.
 So it's almost done.  I already have an idea for my next quilt.

Ann Fahl

Saturday, April 6, 2013

Announcing Applique Ann's Way!

Ann's newest booklet, April 2013

At last the booklet on 6 ways to applique has become a reality.  It is based on my full day workshop, but there was never enough time to cover 6 methods during the class.  So I've put them all together in one booklet, 36 pages with a color cover. I began writing it this past summer, and last month it went to the proof reader, my friend Jayne, because she is great at making my directions simpler and clearer.
Oreo is helping to send out the first promotional copies.
 I cover both traditional and untraditional machine methods, so whether you are a beginner or experienced, you will find something helpful here. If you follow this blog, you know I love thread work of all types, applique is just one method of embellishing fused shapes on a quilt top.  I can never restrict myself to just one technique in a quilt, I really like to mix up embroidery and applique.  This booklet only includes applique methods and I've tried to discuss each one in depth, including tips, refinements and problem solving.


Closeup of Summer Sanctuary, quilt by Ann Fahl
The quilt that started it all was Summer Sanctuary. Check out the coleus leaves, they are made with the Florentine Edge Applique technique discussed in the booklet. This will later be the subject of an article for the American Quilter Magazine next fall.

Read more about this booklet on my website.

Give applique a try.

Barb Harms has posted a review
A  Bit of Yellow has posted a review.

Ann Fahl

Friday, March 22, 2013

The Hockey Applique Begins part 5

Well, I'm not sure if the thread work will be fun or not; it was really fun to design.  I think I may have created a monster with never ending applique and embroidery, in just about every color thread in the rainbow.  So where does one begin, when there are thousands of little pieces to be stitched?

Pick something easy to begin, it is important to get started. In the early stages of a project, sometimes the job appears to be overwhelming--like this one. After I have dealt with the initial hesitation, then I basically work from what appears to be on the bottom layer and work up to the top. This is because the ends of my starts and stops will be covered by another line of stitching on a segment that appears to be on top of it, and this secures any loose threads that need to be controlled. This bottom to top guideline, is the general rule, but of course I break it all the time! If I have blue thread in the machine, I'm not going to hop over and applique a red flower; I'm going to find something else blue to sew before I change my thread color again.
This is the back corner of the hockey bag. I've chosen to use a decorative stitch in variegated blue thread.

So I'm going to applique the hockey bag first with a beautiful blue variegated thread using some of the programmed stitches that my machine offers. The hockey bag is my starting point because it is underneath all the other objects in the picture.  I have chosen my favorite programmed stitch, and I use shiny thread with crisp tear-away stabilizer underneath. [This process will be covered in depth in my new booklet, Applique Ann's Way.]
Here is a sneak peek at the cover of my new booklet! Available in April.

Next I'll embroider the hockey sticks, covering them with thread.  This will be faster than appliqueing them and it will give them a wood grain look. Embroidery is done with a hoop, no stabilizer, and I move the hoop from side to side to completely cover the object. For detailed info see my book Coloring with Thread
A closeup of the embroidery with variegated beige thread, that gives a wood grain effect on the hockey stick.
 Now I realize the finely cut dandelions are curling up and starting to fray, so I'll embroider them next or they may just disappear. 
Dandelion detail in the lower left corner.  These too are embroidered.
So the applique and embroidery has just begun.  This is going to take me some time at the machine. Eventually this blog thread will be continued.  I have hours of decorative stitching ahead of me.

Ann Fahl

Saturday, October 27, 2012

Garden of the Sun God--The End

The last challenge is to find the right fabric for the binding. At first I thought perhaps it would work best to piece a variety of red fabrics together. But then I realized there was a lot of stuff going on in the border already, perhaps one or two fabrics cut on the bias would be a better solution.

It's wonderful when I go digging in my stash and can find a number of possible fabrics for the binding. I chose a red batik with lights, mediums and darks marbled through it.  Perfect. Always cut binding on the bias, the corners will turn flatter, and the long sides will lay flatter. For a thorough discussion on binding your quilt see my booklet on bias binding.


Announcing the completed quilt, Garden of the Sun God, by Ann Fahl, this quilt is now included in my Ancient Artisans gallery on my website.

The completed quilt, Garden of the Sun God, 52.5 x 63 by Ann Fahl © 2012
Ann

Friday, January 6, 2012

What's in the Bag?

This is the bag that stores the miles of bias binding that I have left over from quilt making! I keep a special collection of stripes and plaid fabrics that I like to use for bias. I think bias makes the best and longest lasting binding. (I feel so strongly about this that I wrote a booklet about it.)  There is a strip of almost everything I have in this binding bag, so when I'm auditioning binding fabrics, this bag always gets pulled out.

Last week, in an earlier blog I asked you to vote for how you thought I should bind or face the outer edges of my collage. I initially wanted to face the edges, but something inside of me kept telling me to bind the edges instead. So here is the finished quilt. It is just funky and fun.
Scraps of a Different Color, (c) 2012 by Ann Fahl 32 x 21 inches
I chose to bind it with two of the darker fabrics.  This gives only a slight contrast to the outer edges. I used the blue/green stripe on the left side and the charcoal/red print on the right.

Now that the quilt is complete, I've attached the hanging strips on both the top and lower edge of the quilt back.  The label is attached, which identifies the quilt and me as the maker, and will shortly be uploaded on my website. Also it gets its own listing in my quilt inventory notebook. The digital photography has been taken and stored. My initials always go near the lower right corner. On this quilt it is located near the white spade-like shape.  So it is truly finished. Nothing more needs to be done to document the fact that I made this quilt.
The actual ginkgo leaf I used for the pattern was given to me by my neighbor. She had just been to the library on Lake Michigan and found the leaf.  I immediately cut one out of fabric but never used it.  So this leaf has been pinned up on my design wall for years.  It is good for it to have a real home. I quilted it with a wonderful variegated Superior gold thread.  The purple cup in the corner is from Ginkgoes Galore.
The fish is something I cut out years ago, I think they may have been part of the fish left over that could have been included in Fish Tales! Fish Tales is included in A Black and White Tale.  The coneflower lying on it's side is from the quilt Sewn Together. The little ginkgo leaf is something of which that I've used hundreds.
The pink coneflower is from a large quilt that I am currently embroidering. The cup is from Ginkgoes Galore. The large green hand painted and beaded leaf is from one of my all-time favorites Summer Sanctuary.  I painted hundreds of these coleus leaves and only had 2 or 3 remaining.

As usual, even though I've made a good attempt at using my little fusible scrap shapes, I still have many. It's difficult to close the drawer that holds them.  There will inevitably be more in the future.  It's a challenge to see how I can put them all together.

So here it is for you to enjoy, part of my quilting life in scraps!

Ann Fahl


Monday, September 19, 2011

More Variegated Thread


Warning: do not quilt the cat!
 
Next year, I'll be teaching at the AQS show in Paducah. One of the workshops will be called Colorful Machine Quilting.

I've been making samples and handouts this week. It's always fun to make some unexpected discoveries.  The quilt sample consists of strips in three colors, which I used to quilt across with variegated threads.  Here is what happened.

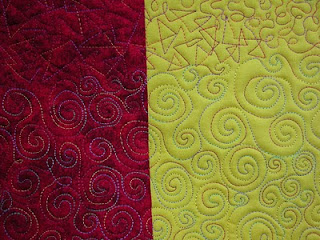
First I chose a multiple variegated thread in primary colors that includes: red, yellow, blue and green. It looks wonderful on the red and yellow. Look closely and you will see that the yellow portion disappears on the yellow fabric, and the same with the read.  It still is wonderful! Rainbow #813.

Here is the multi-varigated on rich blue.  All the colors in the variegation are visible because the blue segment is lighter in color.
Superior Thread came out with a new red/green thread.  This is Rainbow #863. I'm not a Christmassy kind of person but the red and green looked beautiful on the spool.  This thread "sings" on the yellow side, but lacks punch on the red.
The same red and green also looks beautiful on this rich blue fabric.


I guess when it comes down to it; it is much more fun to quilt with a variegated thread on a contrasting fabric.  Do not attempt this while a cat is present!


An update on the Gingko Table Runner from variegated previous posts:  It is now available on Patternspot.com.
You can download this pattern:  Autumn Ginkgo Table Runner, and don't have to pay shipping!
Have fun with variegated thread.  I always do.  Perhaps that's why it is my middle name.

Sincerely,
Ann Variegated Fahl