Translate

Showing posts with label machine quilting. Show all posts

Thursday, January 14, 2016

A New Pair of Quilting Gloves

It has been a long time since posting a blog, and even a longer time since I've done any quilting. I have quilted since 1978 when I took that first quilting class from Nancy Simonsen. At the end of 2012, I retired from the travel part of quilting. It was killing me and I wanted to do other things!

But I haven't quilted for more than 2 years.  My husband got sick, and took my attention away from everything, except making sure he got good care.

I finished a huge family history project 2 weeks ago; a birthday present for my aunt. The last several months, it took every second I had. I started early each day, and worked into the evening, it
was hard to prepare for Christmas. While I was writing I kept thinking, it was time for me to work on a quilt, and decided that was going to be my reward, when the family history was shipped off to the "birthday girl."
Ann with the family history project, completed for her aunt.
After dropping off the book at the post office, I took the weekend off, then found a wall hanging that needed to be quilted.  I played for a day, on a sample to brush up my very rusty skills, chose the threads I'd like to use, put in a new needle, and found a new pair of quilting gloves.  The old ones were very heavily used! It was like getting on a bicycle that you hadn't ridden for years.  I just began.  Oh, it is so much fun.
My shiny new quilting gloves.

It feels good to be back.
Ann

Saturday, April 20, 2013

How Do You Quilt a Hockey Bag? part 6


The time has come to begin all the detailed quilting of my hockey quilt.  I've spent two days outlining all the shapes with monofilament thread. I outline everything using monofilament on top and in the bobbin, with a size 10 titanium topstitch needle. This stabilizes the entire quilt, and reduces the amount of shifting of the fabrics on the wool batting.

Now that the outlining is done,  I can play with the beautiful threads and doodle in the areas between the garden elements. But back to the question; how do you quilt a hockey bag?  This question has never come up before, so I went to my notebook full of quilting ideas and found one idea that would work.
This is the sketch in my quilting design notebook that I chose for the hockey bag.

I keep a notebook (3 ring binder) full of quilting ideas.  So when I need an idea I go to this resource.  This is the sketch of an idea that appealed to me. I used a rich variegated blue thread and it looks great.


I chose a rich blue variegated thread for the quilting on the bag.

Now, how do I quilt a hockey skate?  There is very little space to fill, so I chose a shiny gray thread and began a spiral where the ankle bone pushes out the side of the skate.  I just detailed the rest.

The hockey skate has been embroidered and quilted.

It's time for the sky. So I'm just going to play a little keeping the scale of the curls, coils and loops small.  There is very little space between the hockey sticks and other items to do much quilting.  I chose 2 variegated blue threads to use. The darker for the center and the lighter one for the 2 sides.

Thread choices for quilting the sky.
Here is a closeup of how the coneflowers are detailed and stitched.

Now all that's left is the  grass on the lower edge and the border.  Hmmmm what will I use for the binding? The binding is almost sewn on, here's a peek at how it will look.

Here's a look at the binding and the midnight variegated thread used for quilting the border.
 So it's almost done.  I already have an idea for my next quilt.

Ann Fahl

Friday, March 29, 2013

Needle UP? Needle DOWN?

That is the question.  Having a needle up/down option on your sewing machine makes the job of sewing so much easier.   Once you have the needle up/down option, you can never have a machine without it!
This is the needle up/down on my machine.

When I'm quilting on a piece, if I stop the machine to rest for a moment, the fabric or project can't shift on me if it is set for needle down. Then when I start sewing again, I carefully begin stitching slowly, working up gradually to my regular speed.  If well done, the starts and stops shouldn't show!

When quilting, I like to set the machine for needle down.
When doing free-motion embroidery, I guess it really doesn't matter whether the needle stops in the up or the down position. The starts and stops aren't as visible.

Piecing, is nice when the needle stays up. After each seam is finished, the needle is up and the pieces may be easily removed from the needle area and threads clipped. When I attach bias binding, I like the needle down.

If the project is applique I usually choose to have needle down. If I have to pivot at corners, or have smooth curves, it's nice to have it set down.
Especially when pivoting is necessary at corners, I like the needle to stop down

If you are sewing on a new machine, take the time to notice which way your prefer to set your machine for different tasks.  Then when you begin sewing for the day, set your needle position accordingly.

Caution:  I'd like to leave you with one caution on this subject. Never leave the needle in the fabric or project for long periods of time.  If you are finished sewing for the day, make sure the needle is up.  Should the fabric get pulled away from the machine it won't tear or rip your project.

Hockey project update:  I'm spending time each day doing the embroidery and applique on my Hockey Garden quilt. I still need a good suggestion for a title!  Any ideas?

Ann Fahl  

Friday, November 30, 2012

Quilting Fresh Salsa part 2


Darning feet for Janome, the center metal foot is adjustable.
One of the monumental challenges I faced is what happens when the machine gets to an area where many seams cross. The foot would get caught on the "lump" and not move.  Then when I tried to force it I'd get a few huge stitches, which didn't look very good.

My goal is to create as even a stitch as possible. It stumped me for a little bit, and I realized why many quilters send their tops out to be quilted! Then I remembered that I could adjust my darning foot. (See image above, the center metal foot.)  All I had to do was spin the little wheel above the needle bar until the foot was high enough to just skim over the lumps.  It took awhile, but I found the correct level. For a complete blog on darning feet check out my earlier blog. For Bernina owners, Diane Gaudynski has a method to alter their darning feet check out her blog to read about this.


Altering the darning foot. If you have the above, clear style darning foot, many people find that it drags above the throat plate, even if the pressure on the foot has been reduced to zero.  This isn't a manufactured recommended procedure but it works:
  • Remove the foot from the machine and slightly bend the little bar down (area shown below the arrow).
  • To do this, turn the foot upside down, and firmly press the bar onto the edge of a table or something substantial to do the bending. Bend it just a little.  You will feel it "give."
  • Do be careful, as you can damage the surface of the table when doing this. Your are responsible, not me.
  • Re-attach the foot on the machine, if it is still dragging, remove and bend it a little bit more.
So much for darning feet, let's get back to the quilting.  I completed the center quilting by continually consulting my plan as shown in blog "Machine Quilting Fresh Salsa." This wasn't the fastest quilting job I've ever done, but I followed the map and finally reached  my destination.

Now it's time to quilt the border. How in the world am I going to quilt it?

Ann Fahl

Friday, November 16, 2012

Machine Quilting Fresh Salsa!

It has been awhile since I've done any machine quilting. When this happens a person becomes a little rusty, so I've decided to quilt an old top that has been lying around my studio for about 10 years. This project should get me back in the swing of things.
Fresh Salsa, top only, © by Ann Fahl 51.5 x 51.5 inches


A long time ago this quilt was to be an entry for the special Viking showcase gallery at the IQA show in Houston. To qualify, it needed to be 51 x 51 inches. My sons suggested that I make a quilt about salsa.  I love good fresh chopped tomatoes and pepper as salsa, I could eat gallons of it. Selecting half square triangles in red, green and yellow, I arranged a centrally oriented design, then overlaid a drawing of a tomato cut in half, lined up red iridescent bugle beads on the pencil lines, sewed them all on using NYMO thread, folded the top up and tucked it away in my closet!  I'm sorry, but I never took a photo of the beaded top. You'll just have to believe me that the beads really didn't enhance the over all look of the top.

The red bugle beads that I removed from the quilt top.

Years later, I pulled it out, hung up the beaded top in my studio and decided that the superimposed beaded design didn't enhance the central idea of the quilt, and removed the thousands of beads. Several weeks ago, I got the top out of the closet again; pressed it, blocked it, and pin basted it together. Now I'm machine quilting it.

This is the first time, I have ever quilted a pieced top. Just a pieced top, no beads, embroidery or applique over the surface. For me, this presented a big new challenge. I've thought and thought about how I would quilt it. So I flipped through my recent book on machine quilting, and came up with a plan.

I took a photo of the quilt, and printed 3 copies on 8.5 x 11 paper. I spent an evening doodling on the photo with a black gel pen, and came up with some very specific ideas on how to quilt each defined little area.

Doodling on a paper photo of a quilt, helps me decide what would look best as a quilting design.
Most of the ideas I used, just as is, others have been changed to some extent. Now I'm getting excited, it was time to begin the real quilting.  It has been a long time since I've quilted anything!  But before I can begin I have to select the thread.

We'll talk about thread and quilting next time.  It feels good to be working.

Ann Fahl

Friday, November 2, 2012

House Cleaning and Cat Hair

Most of you have heard about the book I published almost 2 years ago:  A Black and White Tale.  I am still proud of this book and all the effort it took to produce it. The book about Oreo has had a nice run, I find I only have a few cartons left in my closet.

The holidays will soon be upon us, so I have reduced the price from 17.95 to 14.95. Publication costs were higher than I had hoped so it has been priced higher than my $15 target.  Now that the quantities remaining are getting low, I'd like to clear out the closet and make room for new work.

This is a great book for anyone interested in my work. If you know someone that loves quilts or cats, this is a lovely gift for them.  Buy one for yourself. Order two, and I'll pay the postage.

My heart and soul went in to writing this book. Help me find good homes for the remaining copies!  You can read more on my website.

Saturday, October 27, 2012

Garden of the Sun God--The End

The last challenge is to find the right fabric for the binding. At first I thought perhaps it would work best to piece a variety of red fabrics together. But then I realized there was a lot of stuff going on in the border already, perhaps one or two fabrics cut on the bias would be a better solution.

It's wonderful when I go digging in my stash and can find a number of possible fabrics for the binding. I chose a red batik with lights, mediums and darks marbled through it.  Perfect. Always cut binding on the bias, the corners will turn flatter, and the long sides will lay flatter. For a thorough discussion on binding your quilt see my booklet on bias binding.


Announcing the completed quilt, Garden of the Sun God, by Ann Fahl, this quilt is now included in my Ancient Artisans gallery on my website.

The completed quilt, Garden of the Sun God, 52.5 x 63 by Ann Fahl © 2012
Ann

Friday, October 26, 2012

The Quilting: Garden of the Sun God

By now, you may all hope I am done talking about this quilt. To an artist, the piece they have just finished is always the best work they have ever done.  In time, this may change, as it's success or lack of changes my opinion of the work! But for now, it is one of my best.

Detail of quilting at the base of papyrus
Now the quilting has begun. This is the most exciting for me, because all the time and effort I have put into the fabric selection and embroidery pays off. First, I detail all the pieces using monofilament thread in the top and bobbin. Don't cringe.  I have been doing this since the 1980's and it has been successful for me. When monofilament thread is used in the correct way, it will be your best friend. Outlining and stitching in the ditch are two of the best uses no one will ever see it!


Quilting detail of the pond
Next I pull out all my decorative threads and quilt all the empty or negative spaces.  This is what I'm doing when I feel that I am dancing on the quilt. The texture in the quilting brings the subjects to life. This has become an intuitive process for me, because I have been a machine quilter since 1988. This is why I wrote a book on machine quilting--my variety of course.  It is spontaneous, unstructured and informal.  There is too much stippling and feather making on quilts today, and that doesn't work for me. So I wrote Dancing with Thread so others might feel free to experiment with my ideas and techniques.


Quilting detail on the fish and border
I love quilting little scales on fish.  Using a pastel variegated thread, I detail the face and fins first, then use a little clamshell stitch to create the scales.  Without doing lots of detailed fusing, I just use a hand painted fabric, quilt it up, and it becomes a rather life like fish.

Once the quilting on the interior of the quilt is complete, I work on the outer border. After some looking in my notebook of quilting ideas, and looking at earlier quilts I decided to use half a coneflower on the inside edge. They are evenly spaced out along the seam. I used a silver or a white pencil to mark the outlines of each one. The flower has a spiral in the center, and there is random stitching filling the rest of the border. A bright red variegated thread #832 Rainbow, worked beautifully on the various reds in the pieced border.

Allow me to express an opinion here. One of the sad things I am finding in the quilt world is that more and more people are handing over their quilt tops to someone else to quilt.  By doing this, the quilt is no longer the work of one artist! And.....they are missing the most satisfying part of the quilt making process.  LEARN TO QUILT SO YOU CAN COMPLETE YOUR OWN QUILTS.  It's more fun!

Ann Fahl


Friday, October 19, 2012

Embroidery on The Sun God's Garden

After spending so much time and thought on the composition of a quilt, it's fun to actually begin the machine work. For me, the embroidery is what adds rich texture, and holds all the pieces in position.  I do this in a hoop so I don't need any stabilizer underneath the pieces.  This creates a softer quilt top and allows the quilting (over wool batting) to add more dimension to the finished product. For more information on how Ann handles her embroidery refer to her book, Coloring with Thread.

Detail of Scraps of a Different Color showing rejected embroidery pattern
Being a coneflower fan, I wanted to begin with them.  I had already decided how I wanted to embroider my angular flowers. First I had experimented on another quilt where I discovered that I didn't like my first idea. This is why it is so important to test out ideas first, so problems can be avoided on major pieces of work. So I had to rethink my ideas and this is what I came up with.
Embroidery and quilting detail of coneflowers with honey bee
Each petal was detailed in the opposite direction with a variegated pink thread. This was a simple plan which I could easily accomplish, yet different than anything I had done before.

The papyrus was another challenge.  How will I embroider them?  I chose to use metallic blue and green thread to detail the heads, and gold thread for the sepals. This was lots of fun and a challenge to work with metallics.  I had finished writing my Mastering Metallics booklet by this time, so I tested out some of my suggestions! The detail on the curved edge is really pleasing and adds richness of texture.  I also love the little circles that hold the seeds in the papyrus head.
Harry becomes the focal point using Superior Thread's Midnight Rainbow #844
 And then there is Harry. I knew all the embroidery on the bird was going to make him come to life. I didn't worry too much about individual feathers, I just wanted texture.  Midnight Rainbow add the color I wanted over the double dyed blue/purple fabric. Notice that the grass behind the bird adds more depth to the quilt.

Now that the embroidery is complete, all that remains is the quilting.

Friday, May 11, 2012

Where is the Art? My Opinion...............

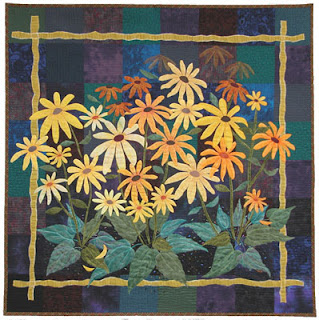
White Coneflowers, by Ann Fahl, my first "big" prize winner!
So I've been home from the big show in Paducah for awhile, and have been re-evaluating what I've seen and where my quilts should be displayed in the future.  As I walked through the show this time, instead of being overwhelmed by all the amazing work; I realized that my work no longer belonged there. Why? This is my same old song.  I am troubled by the lack of good design in so many quilts at so many shows. Oh yes, there were some wonderful pieces in the AQS show, but there were some that were not. AQS has been very supportive of me and my work, so I'd like to make it clear that this is about my opinion on what I see in all competitions, not just in Paducah.

What direction is the quilting world headed? I've been asking myself this for some time now, and my answer is: I don't understand where it's going and I don't want to follow along; I need to take my own path. It is  important that my quilts are uncluttered in design with strong visual impact.

A Brighter Day, by Ann Fahl, the most prize winning quilt I have ever made
I love thread work, of all kinds, but quilter's have gotten all tied up with doing too much thread work and heavy heavy machine quilting--to the extreme!  We have forgotten that the original design of the quilt is the most important element, the thread work in whatever form, just adds texture and surface interest.  As we have gone overboard on the heavy quilting, so have the quilt judges.  They are impressed by the quantity and quality of the thread work and they seem to have forgotten to consider the overall impact of the color and design of the quilt FIRST.

In my opinion, the overall design should be the first consideration when judging, then the workmanship should be considered next. In other words, only those quilts with good design should be selected from the category, then the workmanship should be evaluated to determine which ones are winners.  It appears to me that the quilting/thread work is evaluated first and wins the judges consideration so the design qualities are overlooked. This would account for so many quilts with poor design winning at shows. Yes the quilting is totally amazing on so many of the quilts today, but it isn't the only part of the art form. Great quilting cannot make a poorly designed and conceived quilt-- a good one!
George's Garden, by Ann Fahl

Whether one makes traditional quilts or original designs, quilting is a visual art form. We must step back from our work, and examine its visual impact.  Does it have a focal point? Does something draw the viewer in? Is there balance in the composition? Is there contrast between the colors and elements of the design?  Is there something that unifies the design (ties the quilt together,) such as repetition of shape or color?

Orange Coneflowers By Ann Fahl
What can you do to improve the visual impact of your work?  Take photos of your work in progress or look at the quilt with binoculars backwards. Always use a design wall to design and view the progress of your composition.  Read books on design or take a class. Look through books, magazines and websites and see what you like best, and what is most appealing to your eye. We need to take a step or two back from heavy quilting and spend more time on the initial design, this is what should "sell" your quilt to your viewer or a judge.

A prize winning or a successful quilt should have both a well designed top and great quilting!

Amen.

Ann Fahl

Wednesday, March 14, 2012

Quilts in Color, part 5

Rhonda Rodero is featured today. She has no website, but in the Racine Area, quilter's are aware of her wonderful talents.  She is my neighbor:  meet Rhonda.
The Anderson Art Center
January 29-March 25, 2012
6501 Third Ave.
Kenosha, WI  53143
262-653-0481
hours 1-4:00 Tuesday through Sunday

Wisterias Bloom, quilt by Rhonda Rodero

Haiku  by Marisa Rodero
Wisterias bloom--
Laced with a golden breeze stay
Untouched in glory

Rhonda Rodero comes from a family rich with artistic talent; poets, painters and dancers to name a few. She also has had the advantage of a colorful cultural heritage. She grew up in Arizona and studied in El Salvador, Madrid, Arizona State University, and the University of Southern Florida. Her background provides her with a wide range of subjects from which to draw and a sunny palatte of colors to combine in her quilts. Rhonda found her passion when her husband gave her a sewing machine for their first wedding anniversary.  (He thought she could do the mending!)
Detail, Wisterias Bloom by Rhonda Rodero
Quilting became a serious occupation by the time her two daughters were almost grown. She currently lives in Mount Pleasant, Racine County which is rich with quilters at all levels.  

 Photography and drawing are two of her hobbies which serve her well when it comes to designing her quilts.  She chooses subjects from nature; landscapes, birds and plant life. She uses rich fabrics and covers them with lifelike embroidery and quilts them with close attention to detail to create a sculptured look to her subjects. 
¡Pura Vida!, quilt by Rhonda Rodero

Zenith of Color, quilt by Rhonda Rodero
Combined with her artistic eye, her attention to detail has brought her success in shows and competitions. She has been awarded many prestigious prizes in area and national exhibits.

Night Blooming CereusJasper? Cleo? Is That You?,  and Profusion of Color, quilts by Rhonda Rodero
Quilt detail Profusion of Color

As you can see her ability to draw is very important in her work.  Her sense of color is amazing.
Flight of Fancy, quilt by Rhonda Rodero,  her most recent piece
Even though I don't have a detail photo of this quilt, you can see more of  the attention to detail that I've been telling you about.  Rhonda's heavy quilting makes this quilt come to life with texture. 

Many years ago, Rhonda asked me to come into her house to look at a quilt that she was working on.  I didn't know her well at the time.  She had some questions about some sewing or piecing, I don't remember the exact nature of the difficulty she was experiencing.  I said, "Pull out your thread, and let's see what you might use."  She opened a drawer, pulled out a small box with about five spools of thread in it.  So I said, "Where's the rest of your thread?"  Well those 5 spools were all she had collected!  As you can see, Rhonda's collection of both thread and fabric now includes a broad palette of colors.

Thank you Rhonda for your wonderful work.

Ann Fahl


Thursday, March 8, 2012

Quilts in Color: part 3

This is part 3 about the exhibit Quilts in Color at the:


January 29-March 25, 2012
6501 Third Ave.
Kenosha, WI  53143
262-653-0481
hours 1-4:00 Tuesday through Sunday
The featured artist today is Melody Johnson, who has been a quilt artist since 1981. She was also a professional fabric dyer for twelve years . Melody's education includes a BA in painting and drawing from Northeastern Illinois University in1981 and an MA in Fibers from Northern Illinois University in1994.
Melody's philosophy of quilt making is "all color all the time."  According to her, you can never have enough color! The two of us have had many interesting discussions of color, embroidery and fabric. Her quilts emanate with her joy of color.
Here are Melody's quilts hung above another of the Italian marble fireplaces. The quilts are from her Bon Bon series.
All of Melody's constructions are fused pieces, they appear to be pieced, but they are not.  Her quilting makes them appear to be pieced or appliqued. 
Zig-zag # 5,  quilt by Melody Johnson
 Don't you just love the jagged lines in the "rick rack" segments.  They add such strong directional interest in the quilt.  The edge also has "prairie points" to carry out the zigzag theme; I love the fact that they are irregular.  Melody created the perfect edge for this quilt.  Look closely, this is just a 9 patch block.  Isn't it wonderful and joyous?
Matchstick Moon and Matchstick Moons 2, quilts by Melody Johnson
 To create the surface patterns, Melody has used many fine thin strips to create the circular images and the grass-like textures.
Technique Rebellion III-Redux,  quilt by Melody Johnson
Technique Rebellion, above is without a doubt the most impressive quilt in her gallery.  The color and threadwork take your breath away! I am sorry there isn't a detail shot of this quilt.  It is so rich with thread, it is almost like velvet.
Parallel Paths,  quilt by Melody Johnson
This quilt is reminiscent of some of her mosaic pieces.  This was of course is rich with color and texture.  Her use of her own hand dyed fabrics makes all of her quilts sing.

If you would like to see more of Melody's work, you must visit her website. It is in glorious color and you will love seeing all of her work together.


Melody works in her home studio in Tennessee. "For me it's a balance of making the work and helping others find their artistic gifts. I loved the teaching experience, the encouragement, and mind opening exchange between the student and myself.   Teaching was an extension of my art. I am so happy now to have the time and space to enjoy my husband's retirement, to create new work, and to share my daily adventures via my blog. "
Thanks Melody for adding so much color to our day.

Ann Fahl
 

Saturday, March 3, 2012

Quilts in Color: part 2

This is the second segment in a series about the quilt exhibit at the Anderson Arts Center in Kenosha WI.

January 29-March 25, 2012
6501 Third Ave.
Kenosha, WI  53143
262-653-0481
hours 1-4:00 Tuesday through Sunday
Marcia Stein's work is my subject today.  Marcia is a San Francisco textile artist whose award-winning work has been shown in a number of juried exhibitions at galleries, museums, and quilt shows throughout the country and is included in several public and private collections.  
I have always found large blocks of color in quilts to be most appealing to me.  They make bold statements that make you step back and study and enjoy the work.  As you will see Marcia likes color too. She is the author of a book from C and T called Picture This!  The image on the cover is included in the show.

Quilt by Marcia Stein,  Sidewalk Cafe
The quilt is stunning.  The black and white stripes are of course very graphic, and are machine pieced.  Also umbrellas are always dramatic, even though Marcia's are not opened up.

She says, “While I still enjoy using the geometric shapes of traditional quilt making and the more free-form techniques of contemporary quilt art, my current work focuses on storytelling through appliqué, and for this I call upon my interest in photography.”

“I enjoy seeking out photographic subjects with an eye toward their successful translation into fabric. I like to portray a scene in a representational way yet with a whimsical quality that makes the work smile back at me as I recall the moment I caught the image on film."

Quilt by Marcia Stein,  '52 Pickup

Both of my son's liked this quilt, they used to have a 1995 Dodge pickup. The angle that she used to picture the truck is most interesting. Marcia used a wide variety of fabrics in this one, including some metallic ones. I am sure she had fun creating this quilt.
Quilt by Marcia Stein, French Laundry 
Of all of Marcia's quilts in the exhibit, this one was my favorite.  Laundry isn't my favorite thing to do, but I remember my mother hanging the wash outdoors in the summer when we lived in New Jersey.  My sisters and I would have fun running in and out and around all the sheets and towels.  This setting was inspired by a photo that Marcia took.  You can find it on her website.  The background is just two colors of beige fabric and this creates such a textured and shadowed wall. The laundry hanging on the railing is just wonderful.  The clothing and the shutters behind are hand appliqued. What great detail.
Look at the stitching on the pockets of this pair of pants.


Here is a detail of one of the shutters.
Marcia states, "My current series is based on photographs I took in Santa Fe, Italy, England, and the South of France.”
Ladies in Waiting  and   Gone for a Walk  quilts by Marcia Stein
Gone for a Dip  and   French Laundry  quilts by Marcia Stein
Originally from Chicago, Marcia is a graduate of the University of Michigan in Ann Arbor. She took up quilting in 1992, after a lifelong interest in other needle arts, and has been pursuing her interest in textile art full-time since 1996.
French Shoes by Marcia Stein
 What little girl wouldn't want a pair of shoes like this?  Thank you Marcia for creating such interesting art.

Ann Fahl