Translate

Friday, December 27, 2013

Belated Holiday Message

Christmas was difficult for me this year.  I just couldn't get in the mood. So right up to dinner on Christmas eve, I was still wrapping gifts, delivering them, shopping for last minute items etc. My style has always been prepare early, but this year I was a "goddess of the last minute," to borrow a phrase from Robbi Eklow.

Christmas is over, and I never finished getting ready. I need a nap.  But before I go upstairs for my nap,
I thought I'd share with you some of the Christmas tree quilts I've made in the past.

Ginkgo Christmas Tree 20 x 26 inches a pattern by Ann Fahl
Loving the ginkgo leaf I developed this little wall hanging. It's great for using up scraps.  I used a number of different green fabrics for the leaves, fused them onto the background and embroidered them with my favorite green variegated thread. Using the same thread on all the different fabrics helps to unify the quilt. A bright red 4 inch border gives it a holiday feeling.

Ginkgo Christmas Tree with Snowballs
Here is the same tree in a much smaller size. This time I've added little white snowballs over the embroidered surface. Because of its size it makes a great gift. This one is 9 x 12 inches.  You can lay this one on top of a piece of foam core and set it on a small easel to decorate for the holidays. You could also put the smaller size tree on a table runner or topper.

Christmas Jewels, 1988, made by Ann Fahl and Linda Honsberger 67 x 81 inches, hand quilted
To make a long story short, long ago, my friend Linda and I decided we'd make a sampler quilt together.  We purchased the fabrics at the same time. We each made 6 different blocks, making an extra of each to exchange. There were few rules, the blocks had to be 12 inches and use the fabrics we purchased, but we could set them together any way we wanted.  It was fun to see how they turned out. Linda's was very different than mine. She set hers with a lighter print, setting the blocks on square with 3 across and 4 down. (sorry no photos of hers.) Both the quilts were entirely hand quilted!
A closeup of the center medallion.
Behind the Christmas Tree, by Ann Fahl  24 x 30 inches
Some years ago, I was asked to demonstrate my machine embroidery techniques, so I took the ginkgo tree pattern and set it in a home environment.  I added a little Oreo, her favorite toy and a coneflower to fill the space. This demo piece turned out really well, so I quilted it, bound it and added it to my traveling cat show. You can read more about it by going to the link under the photo.
Here's the red and green tulip quilt again.
Here's the old quilt again, it is my current holiday quilt.  This time I am only 20 stitches short of finishing block 15 of the 20 on the quilt.  The left corner is in the worst condition of any on the quilt.  For the most part, the red fabric was in good shape, but this one edge is falling apart. Perhaps it was exposed to the most wear or sunlight.  As I get to a red border strip, I baste a thin strip of batting on top of the existing piece, and hand applique another red strip on top.  Eventually I will hand quilt over the new appliques.

There are still a few days left of this holiday season.  Have a wonderful one.

I'll see you next year!

Ann Fahl


Thursday, December 12, 2013

Last Update on Jeremiah Lochry

My project to replace the grave marker for Jeremiah Lochry has reached its conclusion. All the pieces have come together; the spelling of his name was determined by research, and what information to include on the memorial has been made.

Jeremiah now has a proper marker. He came to the New World about 1740, with some of his grown sons and perhaps with his wife whose name is not known. He started a new generation of Americans on land he purchased in 1741 which was located originally in the colony of Maryland, that later became Pennsylvania. His children were Jeremiah, William, Archibald, Margaret, John, James, Rebecca and Mary.  William is my ancestor.  Father Jeremiah took part in the early wars of the colonies, and some of his sons to part in the Revolutionary War. He owned quite a bit of land, and raised children that became responsible active citizens.

Jeremiah's birth in Ireland is not documented. He died December 4, 1749 and was the second person to be buried in Lower Marsh Creek Cemetery in Adams County, PA. Today it is a beautiful quiet old cemetery; the nearby Presbyterian Church has been a good caretaker of this historic site. Jeremiah's grave was in considerable disrepair several years ago when I first called for information about him; they asked if I would be willing to replace his stone.  After considerable thought and research, I did.

New gravestone installed Nov 2013.
Rest in peace, Jeremiah.

Ann Fahl

Friday, December 6, 2013

Taking Care of Old Quilts: A New Resource

Have you ever met Ann Wasserman, or heard her speak about quilt history or restoration?  She has more experience in working with old quilts than anyone I know! She has been restoring them for 30 years.  What a coincidence that she should publish her book, at the same time I am restoring my red and green tulip quilt!
This is the cover of Ann's book.
Ask your local quilt shop to order it for you, or better yet, have Ann sign one for you by ordering it at
http://www.annquilts.com/book.html

This book is packed with ideas and photos of how to preserve a quilt. You will learn from an expert.  There are 106 pages, a color cover, and some color pages within. She mentions that when restoring a quilt, do as little as possible! Ann has done an extremely thorough job in giving the reader many options on how to handle repairs. The illustrations and photos are carefully detailed so her techniques are easy to understand. 

 Here are some of the topics she includes in the book:

  • Supplies, basics and fabrics
  • Types of stitches, many illustrations on how to make them
  • Varieties of holes, tears, and slits (who knew there were so many different sizes and shapes?)
  • How and why to repair, patch, applique, reverse applique (how to tackle the tricky ones)
  • Hand, machine work
  • Cleaning, washing, spot cleaning, why not, drying flat
  • Display
  • Storing
  • Musty odors
  • Record keeping
  • Supplier list
  • Bibliography 

The above list is brief, the book includes too many subjects to mention here.  You will see that she has found all of these issues in her historic restorations and knows just how to handle them.  If you want to work with old quilts and textiles, this book is a must read for you. Put this on your Christmas list.

Ann Fahl


Friday, November 29, 2013

Thinking about the Label

Every time I finish a quilt, I make a big ceremony of creating a label for the back.  It's true I didn't make this Red and Green Tulip, but I have put in considerable effort into restoring it.  What should I include on this label?

It would be nice to have a little story about the quilt, where it came from and who fixed it etc. But that would make a pretty big label!  Usually, I iron a piece of treated fabric onto freezer paper and send it through my printer. After pressing it, I sew on a border, sometimes add some embroidery, and sew it on the quilt back.
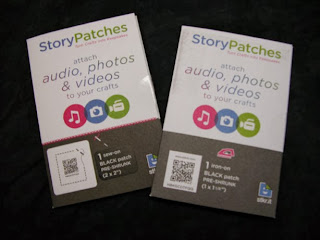
Here are the stkr.it packages

Something came across my desk in October that has presented another idea for the label.  It includes a QR code, which connects a person to a website that includes all the information.  I haven't played with this yet, but it is a great idea for quilts given as gifts.  What is it?

They are called Story Patches.  More information can be found here. I now have a smart phone with a qr code reader so I'll play with it a little bit and report back to you.  Each label is: 
  • Modestly priced
  • Either a sew-on or an iron-on patch
  • Incorporate the patch on a quilt label on the back or in your patchwork on the front!
  • Available in black, blue, green, pink and red
  • Attach audio, photos, messages and videos about the quilt
  • Use your imagination there are many possibilities for their use
  • www.stkrit.com
  • contact@stkr.it
On the left you can see the sew-in label.

Ask your quilt shop to carry them. Let me know how you like them. I do have some questions about the lifetime of the product. They suggest hand washing or machine washing inside out. You may sew on the outside edge of the label, but no through the code itself.  But how long will your message be stored online?  Will it be there when your great grandchildren read the code?  Or will they even know what it is?

I'd like feedback from those of you that have used them. They seem like a wonderful idea for making a more personal label.

Still sewing red and green tulips.

Ann Fahl

Tuesday, November 26, 2013

Being Thankful for Green

This was not a day I was looking forward too.  My husband and I had our wills drawn up and we were supposed to sign them after lunch.  Forty years ago when the first will was drawn up I was so emotional about it, I could hardly speak. Remembering my strong reaction to the occasion made me leery of what might happen today.

Last night, I was finishing cutting the last of the green leaves for my red and green tulip piece. It was very late and I was tired; I came to the realization that I didn't have enough fabric left to complete about 6 blocks. This was so upsetting that I didn't know what to do. As you can probably guess, I didn't sleep well at all last night. For emotional events like this I always make up a list of things to do the next day, so as I'm tossing and turning all night, I know I won't forget to shop for green fabric because this is included on "the list."

My morning was full, no time to go to Sew 'N Save to see if they had any green fabric left.  After lunch we signed our wills, and it went smoothly. There was no sobbing or tears, I guess I'm getting old and crusty as the years pass by.  After we returned home, I drew up the Thanksgiving grocery list; grabbed my green fabric sample and went to the fabric store. This errand was more important than shopping for Thanksgiving. When I reached the store, one of the ladies asked me if I needed help; perhaps I had a wild look about my eyes!  I showed her my fabric, told her my predicament, and she said there was still a partial bolt on the green shelf.  I really couldn't believe my good fortune, there it was, a  perfect match.
Oreo investigating the new green yardage

So here is my Thanksgiving tip for all of you quilters out there.  When making large bed sized quilts, always purchase a yard MORE than you think you will need. As work on a quilt begins, the original plan always gets changed, you will use more of one fabric and less of another.  Because I've concentrated on wall pieces the last 25 years, my estimates for quantities needed for this project were skewed toward smaller quilts. To avoid sleepless nights be safe, buy more than you need.

I am thankful for green today!

Ann Fahl

Friday, November 22, 2013

A Crisis Helps to Work in the White Spaces

Much of my concentration has been on replacing the red and green fabric applique. Now I'm realizing that I need to work on some of the weak spots on the background as I notice them.  In an earlier post I recommended marking the areas that need repair as I go.  This is a good idea.  But if I just mark them, they will all be waiting for me when I'm done with the red and green restoration.  Just working on white will be boring.

So as I write this, I've completed 8 1/2 applique blocks, it's looking beautiful. I've decided to ocasionally let myself repair a rip in the white space. This mixes up the different tasks to vary the job a little bit.

Outburst of Joy, (c) 1984 by Ann Fahl.  My apologies, this is a scan of an old photo, it's the best I can do.
Many years ago I entered a very colorful wallhanging into a local quilt show.  It was a compass style piece with an interesting border, all hand quilted.  This quilt was titled "Outburst of Joy" won a prize, a ribbon was pinned onto the quilt. At the conclusion of the show the ribbon was lying on the floor and there was a 3 cornered tear in the black background of the quilt!


The show organizers were most apologetic and were horrified that this had happened. When they pointed it out to me, I looked at it, and realized that it was small, a tear of about 1/2 inch in two different directions. Fortunately it was contained within a small triangular section of straight line quilting; and I realized that I could applique a matching piece of fabric over the tear. I did this the minute I got the quilt home.

With little tiny stitches, I appliqued a piece of black just inside of the hand quilting stitches.  It fit inside the quilting lines, perfectly.  Because it was a perfect match, nobody except me knew that it had been patched.  This quilt has been sold, long ago. If the owner is reading this blog, this is the first they will know of this affair! 

This is exactly what I will do to the areas in the white background of the tulip quilt as I find and mark them. I will cut a patch of the well washed muslin, and applique it within the quilting lines.
The split in the fabric was marked with thread.

A patch has been cut and appliqued within the quilting lines.

If the damaged area is larger, I will applique a much larger patch, yet inside of the quilting pattern, and quilt over the entire repaired area to match the original.
The patch has been quilted, so the quilting pattern is continuous.  This helps to camouflage the repair.
These photos do look pretty awful, but you are only looking at a small area of the quilt.  When you open the entire quilt up, and you see all the patterns, these patches almost disappear. It's difficult for me to find them. Quilt conservators might use a sheer netting for these repairs. I am intending on using this quilt daily, so I want to repair the weak spots with something that will withstand a little more wear and tear.  My new patches provide new strength to the area.

Still sewing.
Ann
 

Friday, November 15, 2013

Far from Done with Red and Green Tulips


The block in the worst condition of the 20 in the quilt.
It's really exciting when I finish another block. The new fabrics just jump out and grab my attention. They look wonderful. But something bothers me about this fact. The tulips are bold, crisp and new. The background is aged, soft and puckered.  I know how this will be remedied, but it kind of bugs me as I admire my handwork.

I will quilt over some parts of the new applique, like the original maker did.  When the quilting has all been completed, I will gently rinse or wash the entire quilt and let it air dry.  Hopefully the applique will wrinkle up a little bit to give it a softer older look.  I want the old and the new to blend together.

Remember in an earlier blog I talked about the importance of pre-washing fabric? This is why.

Still stitching.

Ann

Friday, November 8, 2013

Restoring the White Background fabric

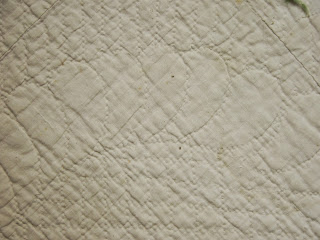
Close up of one of the simple feathered circles in the alternating blocks.

We've pretty much discussed everything about the tulip blocks.  As I've been working on them, I've noticed areas in the white fabric that will need some attention:
  • There are some small holes or splits
  • There are places where the hand quilting needs to be filled in.
  • Soiled areas.
My friend Linda gave me a great tip on how to handle the background repairs; and that is to lay it out on a table or floor and mark all the places that need attention with a safety pin or a loop of colored thread. Do this on the front and the back side.

Now as I work on appliqueing the blocks when I see those little places I will mark them as I go along.

Still Quilting.

Ann

Friday, November 1, 2013

Red and Green Tulip Quilt.........it's history


Here is Oreo sitting on the quilt, with six blocks appliqued.
Here is what I know about the history of this quilt.  It was at the cottage in Winona Lake IN.  It was probably obtained from someone in Marion IN where my great grandparents lived.

My friend Linda Honsberger (appraiser and quilt historian) looked at my quilt and was able to tell me quite a bit about the history of my Red and Green Tulip Quilt.

This is what I've learned about it's beginnings:

  •         It is of German or Mennonite origin
  •      Possibly made in Ohio
  •         Made about 1880
  •         Has wool batting, very thin in places
  •         Hand appliquéd with white thread
  •         Turkey red fabric is in rather good condition.  Only the red outer border has some bad spots.
  •         Green fabric has almost totally disintegrated.  The dyes used at the time, have weakened the fibers so it literally just pulls away easily with your fingers.
  •      It has white cotton binding cut on the straight of the grain, 3/8 inch wide.
  •         The hand quilting is decent. The alternating blocks have a simple feathered circle. The  quilting in the appliquéd blocks and border is straight lines.
  •         The white background fabric is in fairly good condition, there are a few splits in the fabric, so I will repair those by appliquéing well washed muslin over them. 
  •      It was likely a 13th quilt, or someone's wedding quilt, or good quilt that was saved for special occassions.
  •      Sadly, we do not know the maker.

Tuesday, October 29, 2013

Update of Lochry Grave Marker

A million things have happened since my first blog post on the matter of replacing Jeremiah's (my 6 x great grandfather) grave marker. Here is a link to the original blog. Several Loughry family members have corresponded with me, I am pleased for their interest and grateful for their input.  Here is the final and approved gravemarker. 
It was important for me to include that he was the founder of the Loughry family, although most of the descendants spell their last name in alternate ways.  So with the last line "founder of the family in America," addressed that fact, without having to spell the name 25 different ways! Now all there is left to do, is wait for it to be created.

I have to say that this is the most unusual project I've ever undertaken.  Thanks for listening.

Here is the last update on Jeremiah posted Dec 2013.

Ann Fahl


Friday, October 25, 2013

The Actual Rescue of a Quilt Block

We will begin the repairs on this block.

Earlier I talked about what order I would re-applique the blocks. It's not very exciting, but I like to begin with the three stems.  I'll take you through this, step-by-step.  It is important that you remove only one piece at a time; replace it; and then remove the next piece.

Why? because when you remove a piece there are little holes and short threads remaining, to show you exactly where you should stitch the new piece.  If you take off too many pieces at a time you'll lose the markings.  This is old fabric, I don't want to mark with a pencil if I don't have too.

Carefully removing the center stem to be replaced.
I use a seam ripper or a tiny pair of embroidery scissors to do the removing. Make sure you have good light on the project. Remember these threads are old and the fabric underneath is fragile so it's important not to just rip and tear things off. Be gentle.

As I remove threads along the stem, I have to clip some of the stitches on the nearby leaves, but I let them stay in place. Then I replace the center stem with a bias strip. Now you can pull out all the little old snipped threads that were marking its position. Next I remove the right stem and replace, then the left stem and replace. By this time the four leaves are almost hanging by a thread. So one at a time, I remove and replace until all four leaves are finished.
The stems have been replaced with new bias strips, new leaves have been appliqued and the lower triangle has been added.
Now it is time to work on the tulips. The red fabric is shabby, but still firm. So I will leave it in position unless there is a big lump at the outer tip of the flower. If this is the case I'll snip a few threads on the tip, and remove the lump. Now, I'll pin the red tulip petal over the existing red piece and applique it into position. 
Red center petal pinned;  only the upper tip is needle turned and appliqued; remaining edges are raw.
Notice that the lower tip of the red center is folded under. I just pin it in place. You'll notice the fold is aligned with  the lower edge of the green petal. You can also see the black top of a pin marking the edge of the green petal on the left side.

After the one center red petal is pinned and sewn; I lay on the two green side petals. Sometimes the original petals are in such bad condition that they get totally removed. Others that aren't too bad, I'll just applique the new petal over the old.
Green petal appliqued on left side of tulip
Now all that is left is to applique the right green petal.  There are 3 of these tulips in each block.
As of Oct 12, 2013  I have completed 6 blocks and some of the border. I am pleased with my progress.

Still stitching.

Ann Fahl


Friday, October 18, 2013

A New Look for an Old Block

As I begin this blog, I've got 2.5 blocks finished.  Working a little bit each evening, I can re-applique one block in a week.  It's important that this be a NO pressure project, just sewing a little if I feel like it.  Those are my guidelines.  No more high pressure projects that have to be done by a due date!  Quilting should be enjoyable and relaxing.  I've been missing the "relaxing" part for the last few years. And this quilt is for me, not for a show with entry deadlines and qualifications.

When I began my quilting career in 1978, I quilted for about 3 hours every evening. When I say "quilting" I mean all the hand work; applique, quilting and finishing the binding.  I looked forward to this part of every day.  When my children came along, I didn't get 3 hours anymore, but after they were tucked in, I sat down with latest quilt. This was a little bit of my stitching heaven.

Since I've made the switch to being a machine quilter, I've had nothing left to do in the evening, maybe sewing on a label or finishing the occassional bias binding. So this old quilt is fulfilling a need for me.
The first block re-appliqued is one on the outside corner.
When I stepped back from the completed block, I said, "wow."  What an amazing change. I can only imagine how the quilt will look when it is done.  There will have to be some requilting on top of the applique, but that's too much for me to think about right now. Tomorrow is another day. Didn't Scarlett say that?
Detail of the the stems and leaves.
 In the previous post, I talked about how the leaves needed to have points and the stems should be laid under the flowers.  So here is what I meant.  I am also using matching thread colors so little boo-boos don't show. This is quite pleasing to the eye.
A closeup of one of the appliqued tulips. Notice how nice the stem sits under the flower.
I am not restoring this quilt for a museum, I'm fixing it for myself, so I'm taking some liberties with my techniques.  I am using hand techniques that I like to use, and are high quality, not duplicating the stitching by the original maker. So I'm using matching thread.

Next time I'll show you a block in progress.

Ann Fahl


Friday, October 11, 2013

Thoughts on Workmanship

Here is a look at the beautiful stitches on the red tulip pieces.  This woman's workmanship was beautiful, and I don't find the white thread too distracting. At this time in history, a tiny whip stitch was usually used with white thread no matter what the color of the applique.
Small white whip stitching holds the red petal in position

The green fabric is just about gone, so it is hard to tell how the stitches actually looked. There are some whip stitches but there is other sewing with light green thread.  It seems like a different person sewed on the green; or made repairs in later years.   

Look at how the stems are folded over on top of the tulip.  This drives me nuts. Why didn't the maker slip the end under the flower? It would have looked so much nicer and would have been less trouble.
There is a lump at the base of each flower where the bulky stem was turned over.


See how the leaves were almost too big to fit in the spaces, so the maker stuck the ends under or over the stems to fit them in!  This gives an awkward look.  I will trim my leaves to a smaller size so they fit in each space, and give them points at both ends. Look at the photos above and below.
The base leaf on the left was laid over the stem. The leaf on the right barely touches the stem, this is more pleasing. 
The blocks are approximately 14 inches square. What I am seeing is that our skill level and tools we use in quilting today are so far superior to what women used years ago.  Our quilts are so much easier to make.  Also we have good light in our sewing areas and homes which even in the 1950's we didn't have.  

I don't mean to be too critical of this woman's work, it is a beautiful quilt. But the difference is in how far we have come in the quilting world. These little details make a big difference in the final appearance of the quilt.  I think I've been competing in judged shows too long.

At the time I am writing this post, I've actually appliqued 2 blocks and they look beautiful.  Next time, I'll show you the difference!