Translate

Showing posts with label quilt. Show all posts

Friday, April 4, 2014

Feeling Nostalgic

Today, I've decided that I would hang up some of my trillium quilts in the house.  Each month, I hang new quilts in my living room; it gives my largest room a different look; I cycle through my quilts to limit their exposure to light and dust.  I have to say that I am enjoying living with my work so much more than in the past; I guess because I'm not producing as much work at this point in my life.
Sewn Together, original quilt by Ann Fahl  33 x 26 inches.
I happened to unroll a pile of smaller quilts, and out comes my quilt titled Sewn Together. This piece features a featherweight machine that was used by 3 generations of Harvey women.  The first was my Aunt Nelda Vibrans who first purchased the machine.  She grew up in Indiana and spent quite a bit of her life in Chicago. Nelda was the only fiber artist in my family; painting, knitting, sewing and making quilt tops.  Color was what she loved; the two of us used many of the same colors: blue, rose, red, turquoise and purple.
Nelda with her husband Frank Vibrans Sr. in about 1949. She was still sewing with the Featherweight.
Some time later, Nelda gave the machine to her niece Mary Edith Jones.  Mary Edith was a young mother that also liked to sew. Years later, when I was 12 years old, I visited her for a whole month, in Forsyth Georgia; my first time away from my family.  Mary Edith let me sew on this machine, the first time I had ever sat down at one in my life.  I have no idea what I stitched, but it started me down a path of a lifetime of sewing.
Mary Edith with Jasmine the dog in 2005 at age 84.
She exposed me to sewing, and I loved it.  My mother was a pianist who didn't like sewing.  I owe so much to these two women in my family.  They gave me the gift of sewing. This has given me so much creativity and the sense of accomplishment and purpose in my life. One never knows what little idea or craft might spark a child to the extent of changing their life. It certainly was a skill of a lifetime for me!

Teach someone to quilt.

Ann Fahl

Saturday, March 16, 2013

Quilt Museum Needs Your Help

This morning I received an email from Marie Strait, chairman of the board of the San Jose Museum of Quilts and Textiles.  Because of a substantial drop in funding from large corporations and foundations; they find themselves in need of money to meet their expenses. If they cannot meet their goal, they might have to close their doors!

This was the first quilt museum in America.  As quilters, if we can't support them who can? This is a link to the museum's website.  On it you can read the urgent message from Marie Strait, about how much money they need and what it is for.  You can donate using a credit card at this page.

Not long ago, the museum in Paducah needed money to purchase the building where it has been housed for many years.  Quilter's and other sponsors came together, and the building was purchased, saving the museum for future generations.

Please tell your friends about this, your quilt guild, local quilt shop, if we all pitch in, we can help save this quilt museum to preserve our heritage.  This is the contact information for the museum.
520 South First Street
San Jose, CA 95113
Tel: 408.971.0323, Fax: 408.971.7226

Help if you are able.

Ann Fahl

Friday, March 15, 2013

Hockey Garden part 4

To border or not to border that is the question............ I've been trying to answer this for the last week or so.  I've added a vine or two to the subject, just to add a little something more for the viewer to find.

Look closely under the helmet and purple coneflowers to see the beginning of a little vine growing out of the bag.
When I get stuck like this, and an answer doesn't come my way, then I feel it's time to take action.  A border will add focus to my crazy arrangement, so I know there will have to be one, even though it wasn't in my original plan. So rather than just sit and wait for inspiration to hit, I will play with the idea a bit first with fabric, then with photoshop.

I pulled out heaps of fabric to test for a possible border, I held up the black (a little too harsh)  and the blue (not strong enough..) Rather than cut strips of actual fabrics, I folded the large hunks of fabric into long narrow strips and pinned them on the design wall around the hockey piece.

Here is the piece with a black Photoshopped border.
I like the way the black pulls everything together, and makes the garden more of a focal point, not just a mass of stuff.  However I feel the solid black is a little too overpowering as a border.
Here is the piece with a blue Photoshopped border.
I like the blue better, but will it go in my son's apartment or office?  He has brown leather stuff. It still creates a strong focal point, without the harshness of the black.  So what to do?  I will have a diet Coke and slice of fresh lime and think about it.
Here is the actual border.
I found a wonderful denim-like cotton decorator fabric for the top portions, and used a mottled black fabric for the lower border.  It has an ever so slight masculine feel to it.  Voila!!!!  I've added a few more leaves, and pressed the hockey bag over the border and the leaves from the dandelions too.  I love it.  I can almost smell the scent of the gritty hockey equipment, but you will be spared that bit of realism.

Next week, I will begin the embroidery and applique.

Ann Fahl


Thursday, March 14, 2013

TheQuiltShow.com Special Event


Ann, Alex Andersen, Ricky Tims on the day of the filming of Ann's episode.

International Quilt Day is just around the corner, and as a featured artist on a past episode of The Quilt Show, I wanted to let you know about a gift that Alex and Ricky have put together for quilters around the world.  


Beginning on Friday, March 15 through Sunday, March 17, everyone who signs on to The Quilt Show will have free access to over 140 of their internet shows, including my episode #111.  You can watch the shows, check out the tutorials, browse the gallery of over 19,900 member quilts, visit the forum for answers to the most burning quilt questions and lots, lots more. And if you missed my show, you can see it now. Filming this show before an audience was a very exciting experience!


There are prizes and all kinds of things happening that weekend for no charge.


So check in at www.thequiltshow.com on Friday, March 15, and enjoy the shows and exploring The Quilt Show website and all it has to offer!  And I’d love to have you view my show, episode #111.  All of my Oreo quilts will be there!


Ann Fahl

Friday, March 8, 2013

Hockey Garden part 3

This week I've added lots of color.  I liked the hockey stuff sitting around the bag, but I know I'll be happier once some garden elements are in place.  You will notice that I've only added one glove and 3 pucks to the arrangement since last time.
Here's the next stage of "Hockey Garden" most of the elements are pinned onto the background.
The rose bush idea has been thrown out.  I showed you a photo of the rosebush surrounded with hockey sticks last time.  I'm going for something very simple and colorful.  What could be better and easier than coneflowers? I can draw them in my sleep. When discussing flower selection with my husband, he suggested dandelions. Wow what could be better for a garden full of stinky hockey gear? It did take forever to cut out the tiny slender petals of the weeds, but they added a great touch. Since it is winter here in Wisconsin, there weren't any dandelions in the snow, so I had to search on line for photos to use as my inspiration.

In the past, I have always admired Frieda Anderson's dandelion pieces; so have avoided using them, because Frieda had done such a wonderful job with the weeds.  But heck, I've got tons of them in my yard, I should be able to use a couple of them! I love the way their greens add interest and movement to the front edge of the quilt.
You may not want these in your garden, but I love them here.

Now that I have been looking at the quilt at about this stage for a week or two, something is troubling me. I want the corner of the hockey bag to hang below the edge, for a more 3 dimensional effect. But I'm thinking this is getting rather chaotic.  Do I need a border?  I'll have to think about it.

"Keep your stick on the ice."   Red Green

Next time,
Ann

Friday, March 1, 2013

Hockey Garden part 2

The garden with the hockey sticks continues.  I have cut out and placed lots of the hockey items that would be included in a player's gear.  Hockey sticks, helmet, gloves, bag, pucks.
Here is the hockey bag, that has been fabricated since my last post. 
What I usually do for pictorial pieces like this is take a photograph of the object--like the gloves resting on top of the hockey bag.  I simplify the photo into sections that I can fuse together with different colors of fabric to add shading and volume.  I assemble each item and press it onto a piece of baking parchment; instead of having 20 little pieces of fabric, I have one big glove or item to move around on the surface until it is in just the right place.
The helmet was done the same way.  And I think it will be sitting atop a hockey stick in my garden.

My plan was to have a pair of skates in the picture, but the above skate has tons of tiny little pieces in it.  So my quilt will only get one skate, you will have to make believe there are two! I liked having it sit on an angle, it seems more chaotic that way--more "real life!"

What I have shown you has taken weeks to accomplish, and this quilt isn't very big.  But that's how this piece seemed to evolve!  So here is the first big reveal.
Here is the background with the pieces in position.
What's next?  The pucks have to be fabricated and so do the gloves, they are in the photo above cut out of paper.  My plan is to then add the garden elements all to make a quilt without a traditional border.

I'm going to be needing a title for this one, and I need your help with that!

Till next time.........

Ann Fahl

Friday, February 22, 2013

A Ribbon Always Makes Life Better

If you are one of my regular readers, you will remember my blog series on designing and sewing Garden of the Sun God. After a bit of time without receiving any significant awards for my work, I was beginning to doubt my abilities. Over the years, I have learned that there are many ups and downs to working for yourself and as an artist.  This is just one of those things. All of my thoughts, dreams and life are stitched into this quilt, it took longer than many I have designed.  Today I am thrilled and am basking in the glow!
Garden of the Sun God, original quilt by Ann Fahl
This weekend the judges at Mid-Atlantic Quilt Festival in VA, awarded the piece "best machine workmanship" in the Innovative category. I am sending them a big thank you for the award.

Ann Fahl

Friday, December 14, 2012

The Cat Hair Returns

Do you remember the first quilt show you ever attended? Or, the first show you ever entered?

My very first quilt was a blue sampler that I made for my mother. It was a large one, full sized and hand quilted. I entered it in the state historical society show, and won an honorable mention in 1979.  It was really exciting to get a ribbon on my first quilt.
Ann's very first quilt completed in 1978

At the time, I knew nothing about quilt shows, I'd never even been to one!  But the judge made a comment on the back of the ribbon that said, "Pet hair is distracting."

After that comment I thought to myself, "I guess I'll have to watch that when I enter another quilt in the show!" That was something I never even considered doing.

Eventually, when I had more of a studio to work in, there is a procedure that I follow. I always clean off my cutting table first, lay out the quilt, and go over it with a lint roller front and back.  This has always seemed to work.  I always mention that first judge's comments in all my lectures with good humor; in the hopes that it might convince others to check over a quilt carefully before going to a show, or be given as a gift.

Every time a quilt comes home after a show, I open up the box and admire it, and hang it up in my living room. Nine out of ten times my quilt will come back with little threads on it, that were probably from someone else's quilt!  How do I know that?  It's because the threads are always the wrong colors for the fabrics I used. Many times I wonder what famous persons' quilt they came from.  Had they touched?  Did they get to be friends?  Where do all these threads come from?  Do other people find them on their returned quilts too? This is truly one of life's mysteries.
Garden of the Sun God, (c) 2012 Ann Fahl

Late November, my beautiful Garden of the Sun God quilt came back from the IQA show in Houston. It looked beautiful when I opened it up. After finding the judges comment sheets, I sat down to look them over carefully.  (This can be either a very trying experience or a pleasant one.) Their comments were OK this time, but one of the judges took the time to write at the bottom, that I should use a lint brush to remove the pet hairs from the dark areas of my quilt!!! I had to laugh. Like other pet owners, I make an attempt to limit the cat hair in the house, but there is only so much I can do. I looked over the quilt, and I didn't see any Oreo hairs, but perhaps I have selective vision.
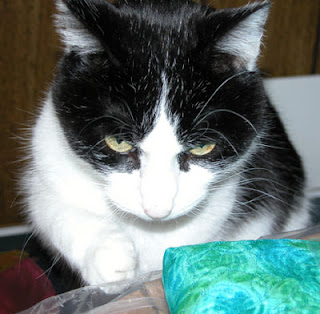
Here is Oreo helping to fold up a quilt.  Could this be the problem?

So I have come full circle in my quilting life.  The first quilt I ever entered in a show had cat hair on it; and the best one I've made to date--also had cat hair on it. And, probably the hundreds of quilts I have made in between also had cat hair on them. What can I say?  I do my best.

I hope this brought a smile to your day.
Ann Fahl

Friday, November 30, 2012

Quilting Fresh Salsa! part 1

Let the quilting begin.....................................................

Here is my sample flaming spiral.  I don't make pretty samples this is really how I work. Did you want glamour?
Let me tell you this quilt has been a challenge from beginning to end. Beginning in the center, I have planned on quilting a flaming spiral with red thread in the center.  Just to make sure, I practice on a sample first.

The actual flaming spiral in the center of the quilt. I like how the thread subtly blends with all the fabrics
The plan is to work from the center out.  I have taped my paper plan to my sewing table so I can refer to it as I move out to the next row.  This feels very much like following a cross stitch diagram or knitting pattern. So I continue to make small samples, change thread color where needed and keep moving outward.
Here is one of the first yellow arrow segments just outside of red center.
Quilting the yellow arrow segments began with a challenge. I wanted to try quilting it with the red thread, and after sewing one leaf, I realized the error of my plan.  The yellow variegated thread really worked the best.  Notice how it subtly emphasizes the leaves in the quilting pattern. I did the same thing in all four arrow segments.
Detail of dark variegated thread on the green triangles.
I worked around the next ring around the quilt, using yellow and red threads.  Then I got a chance to use the dark variegated thread on the green segment. I was very pleased with how it looked. It took quite some time to quilt my way out to the outer edges of the quilt.  I took my time, stopping for the day when I got tired.

I have found that when I quilt for extended periods of time I start to make mistakes and bad choices.  Since there is no deadline on this quilt, I can just take my time. This is a very relaxing way to quilt.

Along the way, I found that the darning foot was catching on the spots were all the seams come together. Since I have reached my limit of blog space, please see part 2.  Continue to scroll down.
Ann Fahl


Quilting Fresh Salsa part 2


Darning feet for Janome, the center metal foot is adjustable.
One of the monumental challenges I faced is what happens when the machine gets to an area where many seams cross. The foot would get caught on the "lump" and not move.  Then when I tried to force it I'd get a few huge stitches, which didn't look very good.

My goal is to create as even a stitch as possible. It stumped me for a little bit, and I realized why many quilters send their tops out to be quilted! Then I remembered that I could adjust my darning foot. (See image above, the center metal foot.)  All I had to do was spin the little wheel above the needle bar until the foot was high enough to just skim over the lumps.  It took awhile, but I found the correct level. For a complete blog on darning feet check out my earlier blog. For Bernina owners, Diane Gaudynski has a method to alter their darning feet check out her blog to read about this.


Altering the darning foot. If you have the above, clear style darning foot, many people find that it drags above the throat plate, even if the pressure on the foot has been reduced to zero.  This isn't a manufactured recommended procedure but it works:
  • Remove the foot from the machine and slightly bend the little bar down (area shown below the arrow).
  • To do this, turn the foot upside down, and firmly press the bar onto the edge of a table or something substantial to do the bending. Bend it just a little.  You will feel it "give."
  • Do be careful, as you can damage the surface of the table when doing this. Your are responsible, not me.
  • Re-attach the foot on the machine, if it is still dragging, remove and bend it a little bit more.
So much for darning feet, let's get back to the quilting.  I completed the center quilting by continually consulting my plan as shown in blog "Machine Quilting Fresh Salsa." This wasn't the fastest quilting job I've ever done, but I followed the map and finally reached  my destination.

Now it's time to quilt the border. How in the world am I going to quilt it?

Ann Fahl

Friday, November 23, 2012

Variegated Thread with Fresh Salsa?

My three choices for thread in the red areas of the quilt Fresh Salsa.

You may think that selecting thread for a quilting project is a small thing, but it's more important than you think.  It pays off when you make the right selection. So now I've got this top that is a cacophony of red, green and yellow, what thread should I choose?

One of my issues with sending your top out to someone else to quilt is that you usually get one color of thread for the quilting. This would make my quilts so boring! Mattress pads are quilted with white thread, how exciting is that? I choose to use multiple threads, usually depending on the color of the fabric where it will be used. No mattress pads for me.

Learn to machine quilt so you can finish your quilt in the manner you choose!  You can do it!

Auditioning the thread. This is shown using white paper just for illustration. It should actually be done on the fabric of your choice.
 Back to Choosing Thread:

  • Pull out all the colors you think might work.
  • Audition them by unreeling about 36 inches of thread and letting it puddle on the project.
  • Give each thread a rating:  yes, no, maybe.
  • Give a second look to the yes and maybe threads, I throw the ones I like best into a basket or bowl, so they are accessible when the quilting begins.
  • If unsure whether to use thread A or B, sew up a little sample of both; hold each sample up to the quilt top, and this should help you make your decision.
  • There is nothing worse than having to rip out lots of machine quilting, after you figure out, you should have used another thread! I have lots of personal experience in this area.
Solid color or Variegated? This is a personal question. Most of the time I prefer to use variegated threads when I quilt. It makes the stitching more exciting on solid color or mottled fabrics. But if you are using prints a solid color thread may be a better choice.  Audition both types of threads to see which you like best.

Contrasting or Matching thread?  Here are some tips I have learned over the years.
  • Matching thread will be less visible, and will hide irregularities in the quilting.
  • Contrasting thread will really accent the quilting, look great from a distance, but will show everything little booboo.
  • A slightly richer color will subtly enhance the quilting without being too distracting.
  • Lighter threads on deep fabric will usually look good.
  • Dark threads on light fabric are very challenging, all the mistakes will show.
  • The choices are up to you.
Rainbow variegated threads, # 851, 814, 844 from Superior Threads
I have chosen three threads to use on my quilt, most are subtle contrasts with the rich colors in the quilt top. The yellow will look great on the small yellow areas of the quilt, because it mixes several yellow tones there will be subtle contrasts and matching colors here. The red thread includes red, purple, and gold, this makes the red areas more exciting. The darker rainbow thread looks great on all dark fabrics and will make the green areas richer on this quilt top.

The quilting will begin next.

Ann Fahl

Friday, November 16, 2012

Machine Quilting Fresh Salsa!

It has been awhile since I've done any machine quilting. When this happens a person becomes a little rusty, so I've decided to quilt an old top that has been lying around my studio for about 10 years. This project should get me back in the swing of things.
Fresh Salsa, top only, © by Ann Fahl 51.5 x 51.5 inches


A long time ago this quilt was to be an entry for the special Viking showcase gallery at the IQA show in Houston. To qualify, it needed to be 51 x 51 inches. My sons suggested that I make a quilt about salsa.  I love good fresh chopped tomatoes and pepper as salsa, I could eat gallons of it. Selecting half square triangles in red, green and yellow, I arranged a centrally oriented design, then overlaid a drawing of a tomato cut in half, lined up red iridescent bugle beads on the pencil lines, sewed them all on using NYMO thread, folded the top up and tucked it away in my closet!  I'm sorry, but I never took a photo of the beaded top. You'll just have to believe me that the beads really didn't enhance the over all look of the top.

The red bugle beads that I removed from the quilt top.

Years later, I pulled it out, hung up the beaded top in my studio and decided that the superimposed beaded design didn't enhance the central idea of the quilt, and removed the thousands of beads. Several weeks ago, I got the top out of the closet again; pressed it, blocked it, and pin basted it together. Now I'm machine quilting it.

This is the first time, I have ever quilted a pieced top. Just a pieced top, no beads, embroidery or applique over the surface. For me, this presented a big new challenge. I've thought and thought about how I would quilt it. So I flipped through my recent book on machine quilting, and came up with a plan.

I took a photo of the quilt, and printed 3 copies on 8.5 x 11 paper. I spent an evening doodling on the photo with a black gel pen, and came up with some very specific ideas on how to quilt each defined little area.

Doodling on a paper photo of a quilt, helps me decide what would look best as a quilting design.
Most of the ideas I used, just as is, others have been changed to some extent. Now I'm getting excited, it was time to begin the real quilting.  It has been a long time since I've quilted anything!  But before I can begin I have to select the thread.

We'll talk about thread and quilting next time.  It feels good to be working.

Ann Fahl

Friday, November 9, 2012

Quilt Judge on a Soap Box


Not too long ago, I was one of a panel of judges for a lovely quilt show, in a modest sized midwestern town.  Some of the work was outstanding; there was quite a bit of hand applique, a few hand quilted pieces, some amazing pieced work, a few were absolutely masterfully made, yet there were only 5 entries that were original designs!


Pardon me while I pull out my soap box one more time after a quilt exhibit.......... What has happened to us as quilters? Quilting has enjoyed a great resurgence of interest since about 1976--the bicentennial year. Have we still not learned enough about our art/craft to create more original work? Perhaps quilting has become more of a money making business rather than an art.  There are businesses creating books and patterns, tv shows, tool manufacturers, big exhibitions and contests, there are websites and workshops to teach new ideas,  and the list goes on and on........
We can cut out all the pieces for a quilt by cranking a machine, we don't need scissors and rotary cutters. We can sit at a sewing machine, and let it do the stitching for us.  If we create a top, we send it out to be quilted. Somewhere we have lost the joy and satisfaction of creating our own work.  I think you get the idea.
Everyone is trying to sell something!
Each time I finish a quilt, whether large or small, I feel a great sense of satisfaction in creating something that is truly my own. The process of making a quilt is similar to a treasure hunt. I begin with a small idea, and I keep working on a design wall, until pleased with its composition and appearance.  Yes, it takes time to create something that is your own. Most of the time I never know what the final project will look like until it's done.  Why use a pattern, you already know what the finished product will look like?  Where is the surprise?

Ann almost feels like a queen when she finishes a new project, she feels so proud.

Yes, we all have different talents and skills.  Let me challenge all of my readers to try to add something original to each project you begin.  You may be surprised to find you have the skills to create more than you think. You will become more confident in yourself.  Sometimes this path will put some obstacles in your way, it isn't always easy. Remember that the quilting community is one of the most helpful and supportive group of people in the world.  Ask for assistance and you will find many suggestions and possible solutions. After a few projects your skill and idea bank will grow.

Please give this a try. As a community we need to rediscover our creativity.  It's in there, we just need to let it grow.

Ann Fahl

Friday, November 2, 2012

House Cleaning and Cat Hair

Most of you have heard about the book I published almost 2 years ago:  A Black and White Tale.  I am still proud of this book and all the effort it took to produce it. The book about Oreo has had a nice run, I find I only have a few cartons left in my closet.

The holidays will soon be upon us, so I have reduced the price from 17.95 to 14.95. Publication costs were higher than I had hoped so it has been priced higher than my $15 target.  Now that the quantities remaining are getting low, I'd like to clear out the closet and make room for new work.

This is a great book for anyone interested in my work. If you know someone that loves quilts or cats, this is a lovely gift for them.  Buy one for yourself. Order two, and I'll pay the postage.

My heart and soul went in to writing this book. Help me find good homes for the remaining copies!  You can read more on my website.

Friday, October 26, 2012

The Quilting: Garden of the Sun God

By now, you may all hope I am done talking about this quilt. To an artist, the piece they have just finished is always the best work they have ever done.  In time, this may change, as it's success or lack of changes my opinion of the work! But for now, it is one of my best.

Detail of quilting at the base of papyrus
Now the quilting has begun. This is the most exciting for me, because all the time and effort I have put into the fabric selection and embroidery pays off. First, I detail all the pieces using monofilament thread in the top and bobbin. Don't cringe.  I have been doing this since the 1980's and it has been successful for me. When monofilament thread is used in the correct way, it will be your best friend. Outlining and stitching in the ditch are two of the best uses no one will ever see it!


Quilting detail of the pond
Next I pull out all my decorative threads and quilt all the empty or negative spaces.  This is what I'm doing when I feel that I am dancing on the quilt. The texture in the quilting brings the subjects to life. This has become an intuitive process for me, because I have been a machine quilter since 1988. This is why I wrote a book on machine quilting--my variety of course.  It is spontaneous, unstructured and informal.  There is too much stippling and feather making on quilts today, and that doesn't work for me. So I wrote Dancing with Thread so others might feel free to experiment with my ideas and techniques.


Quilting detail on the fish and border
I love quilting little scales on fish.  Using a pastel variegated thread, I detail the face and fins first, then use a little clamshell stitch to create the scales.  Without doing lots of detailed fusing, I just use a hand painted fabric, quilt it up, and it becomes a rather life like fish.

Once the quilting on the interior of the quilt is complete, I work on the outer border. After some looking in my notebook of quilting ideas, and looking at earlier quilts I decided to use half a coneflower on the inside edge. They are evenly spaced out along the seam. I used a silver or a white pencil to mark the outlines of each one. The flower has a spiral in the center, and there is random stitching filling the rest of the border. A bright red variegated thread #832 Rainbow, worked beautifully on the various reds in the pieced border.

Allow me to express an opinion here. One of the sad things I am finding in the quilt world is that more and more people are handing over their quilt tops to someone else to quilt.  By doing this, the quilt is no longer the work of one artist! And.....they are missing the most satisfying part of the quilt making process.  LEARN TO QUILT SO YOU CAN COMPLETE YOUR OWN QUILTS.  It's more fun!

Ann Fahl


Friday, October 19, 2012

Embroidery on The Sun God's Garden

After spending so much time and thought on the composition of a quilt, it's fun to actually begin the machine work. For me, the embroidery is what adds rich texture, and holds all the pieces in position.  I do this in a hoop so I don't need any stabilizer underneath the pieces.  This creates a softer quilt top and allows the quilting (over wool batting) to add more dimension to the finished product. For more information on how Ann handles her embroidery refer to her book, Coloring with Thread.

Detail of Scraps of a Different Color showing rejected embroidery pattern
Being a coneflower fan, I wanted to begin with them.  I had already decided how I wanted to embroider my angular flowers. First I had experimented on another quilt where I discovered that I didn't like my first idea. This is why it is so important to test out ideas first, so problems can be avoided on major pieces of work. So I had to rethink my ideas and this is what I came up with.
Embroidery and quilting detail of coneflowers with honey bee
Each petal was detailed in the opposite direction with a variegated pink thread. This was a simple plan which I could easily accomplish, yet different than anything I had done before.

The papyrus was another challenge.  How will I embroider them?  I chose to use metallic blue and green thread to detail the heads, and gold thread for the sepals. This was lots of fun and a challenge to work with metallics.  I had finished writing my Mastering Metallics booklet by this time, so I tested out some of my suggestions! The detail on the curved edge is really pleasing and adds richness of texture.  I also love the little circles that hold the seeds in the papyrus head.
Harry becomes the focal point using Superior Thread's Midnight Rainbow #844
 And then there is Harry. I knew all the embroidery on the bird was going to make him come to life. I didn't worry too much about individual feathers, I just wanted texture.  Midnight Rainbow add the color I wanted over the double dyed blue/purple fabric. Notice that the grass behind the bird adds more depth to the quilt.

Now that the embroidery is complete, all that remains is the quilting.

Friday, October 5, 2012

Garden of the Sun God -or- Harry leaves the paper

I have been arranging, moving, shifting pieces of the quilt, taking breaks, looking at the quilt again, and using binoculars backwards. Taking digital photos and carefully looking at the image on the little screen of your camera can also give you another view of the quilt.  I've moved Harry up, then down, over a little bit, and finally he is resting on two lily pads in the pond.


Harry finally gets pulled off of his paper foundation.
Almost all of the elements are in place.  Harry has been oh, so carefully removed from the baking parchment sheet and pinned in place.  Originally, I wanted him to rest on the big carp in the center, but I had chosen a light yellow/green/purple painted fabric and his feet disappeared due to lack of contrast.  So, I wound up cutting the fish in half, putting the fish halves on each end, and moving the lily pads to the center, so he could rest on them. Yes I could have fabricated a fish out of a different fabric, but I loved the first one I made, so this shift in plans made everything work!

Look at the papyrus on the left you will see a similarity in my arrangement  to one of my favorite quilts On the Nile. The "swooping" papyrus that crosses over the lower part of the sashing was inspired by a gold box that was included in the King Tut exhibit that traveled the world in the late 2000's.

There is still that empty red spot in the upper center of the quilt.  The symbol of the sun god will go there.  You can see my white paper pattern in the place where it is to rest.

Friday, September 28, 2012

Garden of the Sun God-or-Harry the Heron comes back

Harry the Heron has been fabricated and fused onto baking parchment.
Needing to concentrate on the heron, I removed the papyrus and coneflowers that had been floating on the background. Doesn't he look great standing in front of his new home?  This is such an exciting part of the design process when everything is flowing well.

I wanted to make the coneflowers, one of my favorite images to use in quilts; look Egyptian.  So I drew them to fit in a diamond shape to become more angular.

A left-over Egyptian coneflower.
 I cut out more coneflowers than I needed, but that always leaves some to use for embroidery practice. If you look at my quilt Scraps of a Different Color you will see an extra one that has been inserted into a collage.  By doing this, I learned how I didn't want to embroider the flower in my Sun God quilt!  If you look at the close up images you will see how it was embroidered. Allowing yourself to play with your images and experiment with ideas is important because it helps you make better decisions when it comes to your more important work.
Here is Harry now standing among the papyrus and coneflowers.
The coneflowers have been pinned in place, with long graceful curving stems and a few green leaves to anchor the plant.  The papyrus are back in position, with a warm brown fabric that was eventually used for the stems. Things are looking good.

Why is Harry still pressed on baking parchment?  Because at this point in the design phase I want to be free to move the all elements around until I am completely sure everything is in the right spot. His beak, feathers and legs are too long and narrow to be able to shift around; so he stayed on paper until it was time to fuse everything on permanently.

Tune in next time, to see if Harry gets glued on!

Ann Fahl