Translate

Showing posts with label gardens. Show all posts

Friday, March 22, 2013

The Hockey Applique Begins part 5

Well, I'm not sure if the thread work will be fun or not; it was really fun to design.  I think I may have created a monster with never ending applique and embroidery, in just about every color thread in the rainbow.  So where does one begin, when there are thousands of little pieces to be stitched?

Pick something easy to begin, it is important to get started. In the early stages of a project, sometimes the job appears to be overwhelming--like this one. After I have dealt with the initial hesitation, then I basically work from what appears to be on the bottom layer and work up to the top. This is because the ends of my starts and stops will be covered by another line of stitching on a segment that appears to be on top of it, and this secures any loose threads that need to be controlled. This bottom to top guideline, is the general rule, but of course I break it all the time! If I have blue thread in the machine, I'm not going to hop over and applique a red flower; I'm going to find something else blue to sew before I change my thread color again.
This is the back corner of the hockey bag. I've chosen to use a decorative stitch in variegated blue thread.

So I'm going to applique the hockey bag first with a beautiful blue variegated thread using some of the programmed stitches that my machine offers. The hockey bag is my starting point because it is underneath all the other objects in the picture.  I have chosen my favorite programmed stitch, and I use shiny thread with crisp tear-away stabilizer underneath. [This process will be covered in depth in my new booklet, Applique Ann's Way.]
Here is a sneak peek at the cover of my new booklet! Available in April.

Next I'll embroider the hockey sticks, covering them with thread.  This will be faster than appliqueing them and it will give them a wood grain look. Embroidery is done with a hoop, no stabilizer, and I move the hoop from side to side to completely cover the object. For detailed info see my book Coloring with Thread. 
A closeup of the embroidery with variegated beige thread, that gives a wood grain effect on the hockey stick.
 Now I realize the finely cut dandelions are curling up and starting to fray, so I'll embroider them next or they may just disappear. 
Dandelion detail in the lower left corner.  These too are embroidered.
So the applique and embroidery has just begun.  This is going to take me some time at the machine. Eventually this blog thread will be continued.  I have hours of decorative stitching ahead of me.

Ann Fahl

Friday, March 15, 2013

Hockey Garden part 4

To border or not to border that is the question............ I've been trying to answer this for the last week or so.  I've added a vine or two to the subject, just to add a little something more for the viewer to find.

Look closely under the helmet and purple coneflowers to see the beginning of a little vine growing out of the bag.
When I get stuck like this, and an answer doesn't come my way, then I feel it's time to take action.  A border will add focus to my crazy arrangement, so I know there will have to be one, even though it wasn't in my original plan. So rather than just sit and wait for inspiration to hit, I will play with the idea a bit first with fabric, then with photoshop.

I pulled out heaps of fabric to test for a possible border, I held up the black (a little too harsh)  and the blue (not strong enough..) Rather than cut strips of actual fabrics, I folded the large hunks of fabric into long narrow strips and pinned them on the design wall around the hockey piece.

Here is the piece with a black Photoshopped border.
I like the way the black pulls everything together, and makes the garden more of a focal point, not just a mass of stuff.  However I feel the solid black is a little too overpowering as a border.
Here is the piece with a blue Photoshopped border.
I like the blue better, but will it go in my son's apartment or office?  He has brown leather stuff. It still creates a strong focal point, without the harshness of the black.  So what to do?  I will have a diet Coke and slice of fresh lime and think about it.
Here is the actual border.
I found a wonderful denim-like cotton decorator fabric for the top portions, and used a mottled black fabric for the lower border.  It has an ever so slight masculine feel to it.  Voila!!!!  I've added a few more leaves, and pressed the hockey bag over the border and the leaves from the dandelions too.  I love it.  I can almost smell the scent of the gritty hockey equipment, but you will be spared that bit of realism.

Next week, I will begin the embroidery and applique.

Ann Fahl


Friday, March 8, 2013

Hockey Garden part 3

This week I've added lots of color.  I liked the hockey stuff sitting around the bag, but I know I'll be happier once some garden elements are in place.  You will notice that I've only added one glove and 3 pucks to the arrangement since last time.
Here's the next stage of "Hockey Garden" most of the elements are pinned onto the background.
The rose bush idea has been thrown out.  I showed you a photo of the rosebush surrounded with hockey sticks last time.  I'm going for something very simple and colorful.  What could be better and easier than coneflowers? I can draw them in my sleep. When discussing flower selection with my husband, he suggested dandelions. Wow what could be better for a garden full of stinky hockey gear? It did take forever to cut out the tiny slender petals of the weeds, but they added a great touch. Since it is winter here in Wisconsin, there weren't any dandelions in the snow, so I had to search on line for photos to use as my inspiration.

In the past, I have always admired Frieda Anderson's dandelion pieces; so have avoided using them, because Frieda had done such a wonderful job with the weeds.  But heck, I've got tons of them in my yard, I should be able to use a couple of them! I love the way their greens add interest and movement to the front edge of the quilt.
You may not want these in your garden, but I love them here.

Now that I have been looking at the quilt at about this stage for a week or two, something is troubling me. I want the corner of the hockey bag to hang below the edge, for a more 3 dimensional effect. But I'm thinking this is getting rather chaotic.  Do I need a border?  I'll have to think about it.

"Keep your stick on the ice."   Red Green

Next time,
Ann

Friday, March 1, 2013

Hockey Garden part 2

The garden with the hockey sticks continues.  I have cut out and placed lots of the hockey items that would be included in a player's gear.  Hockey sticks, helmet, gloves, bag, pucks.
Here is the hockey bag, that has been fabricated since my last post. 
What I usually do for pictorial pieces like this is take a photograph of the object--like the gloves resting on top of the hockey bag.  I simplify the photo into sections that I can fuse together with different colors of fabric to add shading and volume.  I assemble each item and press it onto a piece of baking parchment; instead of having 20 little pieces of fabric, I have one big glove or item to move around on the surface until it is in just the right place.
The helmet was done the same way.  And I think it will be sitting atop a hockey stick in my garden.

My plan was to have a pair of skates in the picture, but the above skate has tons of tiny little pieces in it.  So my quilt will only get one skate, you will have to make believe there are two! I liked having it sit on an angle, it seems more chaotic that way--more "real life!"

What I have shown you has taken weeks to accomplish, and this quilt isn't very big.  But that's how this piece seemed to evolve!  So here is the first big reveal.
Here is the background with the pieces in position.
What's next?  The pucks have to be fabricated and so do the gloves, they are in the photo above cut out of paper.  My plan is to then add the garden elements all to make a quilt without a traditional border.

I'm going to be needing a title for this one, and I need your help with that!

Till next time.........

Ann Fahl

Friday, February 22, 2013

A Ribbon Always Makes Life Better

If you are one of my regular readers, you will remember my blog series on designing and sewing Garden of the Sun God. After a bit of time without receiving any significant awards for my work, I was beginning to doubt my abilities. Over the years, I have learned that there are many ups and downs to working for yourself and as an artist.  This is just one of those things. All of my thoughts, dreams and life are stitched into this quilt, it took longer than many I have designed.  Today I am thrilled and am basking in the glow!
Garden of the Sun God, original quilt by Ann Fahl
This weekend the judges at Mid-Atlantic Quilt Festival in VA, awarded the piece "best machine workmanship" in the Innovative category. I am sending them a big thank you for the award.

Ann Fahl

Tuesday, February 12, 2013

A Different View of a Garden Quilt

It was just before the holiday season when I stopped to have dinner with my son in Chicago.  My creative mind was in the "off" mode at the time, and he suggested that I start a quilt called "Hockey Garden." Of course I immediately dismissed the idea, because I have already made a hockey quilt. Hockey Mom was made years back when both my sons were playing hockey and my husband was coaching.  Hockey was all that was discussed in our house that particular year. I did have great fun making this quilt and it is my only self portrait.

Hockey Mom, quilt (c) Ann Fahl made in 1996, 39.5 x 41 inches.  Also pictured in Quilter's Newsletter  Dec '96
But as time passed by, I decided that I had a really good idea for a hockey garden quilt.  The next few posts will show the piece in progress. You may recall my post called the World's Most Expensive Free Rose Bush? A year or two ago, my neighbor gave me a start from her grandmother's old fashioned rose bush, and I used my son's broken hockey sticks to keep it under control.  I decided to take this same idea and make it into a small quilt.

Here is the rose bush, surrounded by the expensive broken hockey sticks!


Background of the new quilt Hockey Garden.
 So here is the beginning of my next quilt.  I've pieced together a sky background, the foreground is a little bit of garden soil and grass. My idea is to have a garden of fragrant flowers growing in and around some smelly hockey gear.  Only mother's with hockey players will truly understand this. 
Here is the hockey bag which is central to the life of a hockey player because it contains all of their expensive equipment.  No matter how often the stuff is washed there is always a very strong unpleasant aroma attached to it.  The bag is also central to my future garden as a planter.

There will be more later.

Ann Fahl

Saturday, October 27, 2012

Garden of the Sun God--The End

The last challenge is to find the right fabric for the binding. At first I thought perhaps it would work best to piece a variety of red fabrics together. But then I realized there was a lot of stuff going on in the border already, perhaps one or two fabrics cut on the bias would be a better solution.

It's wonderful when I go digging in my stash and can find a number of possible fabrics for the binding. I chose a red batik with lights, mediums and darks marbled through it.  Perfect. Always cut binding on the bias, the corners will turn flatter, and the long sides will lay flatter. For a thorough discussion on binding your quilt see my booklet on bias binding.


Announcing the completed quilt, Garden of the Sun God, by Ann Fahl, this quilt is now included in my Ancient Artisans gallery on my website.

The completed quilt, Garden of the Sun God, 52.5 x 63 by Ann Fahl © 2012
Ann

Friday, October 26, 2012

The Quilting: Garden of the Sun God

By now, you may all hope I am done talking about this quilt. To an artist, the piece they have just finished is always the best work they have ever done.  In time, this may change, as it's success or lack of changes my opinion of the work! But for now, it is one of my best.

Detail of quilting at the base of papyrus
Now the quilting has begun. This is the most exciting for me, because all the time and effort I have put into the fabric selection and embroidery pays off. First, I detail all the pieces using monofilament thread in the top and bobbin. Don't cringe.  I have been doing this since the 1980's and it has been successful for me. When monofilament thread is used in the correct way, it will be your best friend. Outlining and stitching in the ditch are two of the best uses no one will ever see it!


Quilting detail of the pond
Next I pull out all my decorative threads and quilt all the empty or negative spaces.  This is what I'm doing when I feel that I am dancing on the quilt. The texture in the quilting brings the subjects to life. This has become an intuitive process for me, because I have been a machine quilter since 1988. This is why I wrote a book on machine quilting--my variety of course.  It is spontaneous, unstructured and informal.  There is too much stippling and feather making on quilts today, and that doesn't work for me. So I wrote Dancing with Thread so others might feel free to experiment with my ideas and techniques.


Quilting detail on the fish and border
I love quilting little scales on fish.  Using a pastel variegated thread, I detail the face and fins first, then use a little clamshell stitch to create the scales.  Without doing lots of detailed fusing, I just use a hand painted fabric, quilt it up, and it becomes a rather life like fish.

Once the quilting on the interior of the quilt is complete, I work on the outer border. After some looking in my notebook of quilting ideas, and looking at earlier quilts I decided to use half a coneflower on the inside edge. They are evenly spaced out along the seam. I used a silver or a white pencil to mark the outlines of each one. The flower has a spiral in the center, and there is random stitching filling the rest of the border. A bright red variegated thread #832 Rainbow, worked beautifully on the various reds in the pieced border.

Allow me to express an opinion here. One of the sad things I am finding in the quilt world is that more and more people are handing over their quilt tops to someone else to quilt.  By doing this, the quilt is no longer the work of one artist! And.....they are missing the most satisfying part of the quilt making process.  LEARN TO QUILT SO YOU CAN COMPLETE YOUR OWN QUILTS.  It's more fun!

Ann Fahl


Friday, October 19, 2012

Embroidery on The Sun God's Garden

After spending so much time and thought on the composition of a quilt, it's fun to actually begin the machine work. For me, the embroidery is what adds rich texture, and holds all the pieces in position.  I do this in a hoop so I don't need any stabilizer underneath the pieces.  This creates a softer quilt top and allows the quilting (over wool batting) to add more dimension to the finished product. For more information on how Ann handles her embroidery refer to her book, Coloring with Thread.

Detail of Scraps of a Different Color showing rejected embroidery pattern
Being a coneflower fan, I wanted to begin with them.  I had already decided how I wanted to embroider my angular flowers. First I had experimented on another quilt where I discovered that I didn't like my first idea. This is why it is so important to test out ideas first, so problems can be avoided on major pieces of work. So I had to rethink my ideas and this is what I came up with.
Embroidery and quilting detail of coneflowers with honey bee
Each petal was detailed in the opposite direction with a variegated pink thread. This was a simple plan which I could easily accomplish, yet different than anything I had done before.

The papyrus was another challenge.  How will I embroider them?  I chose to use metallic blue and green thread to detail the heads, and gold thread for the sepals. This was lots of fun and a challenge to work with metallics.  I had finished writing my Mastering Metallics booklet by this time, so I tested out some of my suggestions! The detail on the curved edge is really pleasing and adds richness of texture.  I also love the little circles that hold the seeds in the papyrus head.
Harry becomes the focal point using Superior Thread's Midnight Rainbow #844
 And then there is Harry. I knew all the embroidery on the bird was going to make him come to life. I didn't worry too much about individual feathers, I just wanted texture.  Midnight Rainbow add the color I wanted over the double dyed blue/purple fabric. Notice that the grass behind the bird adds more depth to the quilt.

Now that the embroidery is complete, all that remains is the quilting.

Friday, October 12, 2012

Time to put the Sun in the Garden

The sun rests above the garden.
The black "bowl" above the heron's panel is actually a cow horn headdress.  It holds a flaming sun that I created from a commercial fiery red fabric. One of the earliest symbols in ancient drawings and art is the sun disk.  In early Egypt is was shown as a headdress worn by the goddess Hathor, or seen as simply a round disk in the sky.  Now the flaming red sun fabric can warm my quilted garden.

It is now time to permanently fuse all the pieces in position.  I do this on my design wall, after painstakingly removing the paper backing from the Wonder-Under.

I thought I was done. After reviewing a photo of the "finished" piece, I realized that the panel behind Harry needed a little something.
Addition of grass in center panel
I cut out some little grass like shapes and they seemed to fill the soil area behind Harry. Yes, this is a small thing, but the empty field now has what it needs.

Now it is time to begin the embroidery.

Friday, October 5, 2012

Garden of the Sun God -or- Harry leaves the paper

I have been arranging, moving, shifting pieces of the quilt, taking breaks, looking at the quilt again, and using binoculars backwards. Taking digital photos and carefully looking at the image on the little screen of your camera can also give you another view of the quilt.  I've moved Harry up, then down, over a little bit, and finally he is resting on two lily pads in the pond.


Harry finally gets pulled off of his paper foundation.
Almost all of the elements are in place.  Harry has been oh, so carefully removed from the baking parchment sheet and pinned in place.  Originally, I wanted him to rest on the big carp in the center, but I had chosen a light yellow/green/purple painted fabric and his feet disappeared due to lack of contrast.  So, I wound up cutting the fish in half, putting the fish halves on each end, and moving the lily pads to the center, so he could rest on them. Yes I could have fabricated a fish out of a different fabric, but I loved the first one I made, so this shift in plans made everything work!

Look at the papyrus on the left you will see a similarity in my arrangement  to one of my favorite quilts On the Nile. The "swooping" papyrus that crosses over the lower part of the sashing was inspired by a gold box that was included in the King Tut exhibit that traveled the world in the late 2000's.

There is still that empty red spot in the upper center of the quilt.  The symbol of the sun god will go there.  You can see my white paper pattern in the place where it is to rest.

Friday, September 28, 2012

Garden of the Sun God-or-Harry the Heron comes back

Harry the Heron has been fabricated and fused onto baking parchment.
Needing to concentrate on the heron, I removed the papyrus and coneflowers that had been floating on the background. Doesn't he look great standing in front of his new home?  This is such an exciting part of the design process when everything is flowing well.

I wanted to make the coneflowers, one of my favorite images to use in quilts; look Egyptian.  So I drew them to fit in a diamond shape to become more angular.

A left-over Egyptian coneflower.
 I cut out more coneflowers than I needed, but that always leaves some to use for embroidery practice. If you look at my quilt Scraps of a Different Color you will see an extra one that has been inserted into a collage.  By doing this, I learned how I didn't want to embroider the flower in my Sun God quilt!  If you look at the close up images you will see how it was embroidered. Allowing yourself to play with your images and experiment with ideas is important because it helps you make better decisions when it comes to your more important work.
Here is Harry now standing among the papyrus and coneflowers.
The coneflowers have been pinned in place, with long graceful curving stems and a few green leaves to anchor the plant.  The papyrus are back in position, with a warm brown fabric that was eventually used for the stems. Things are looking good.

Why is Harry still pressed on baking parchment?  Because at this point in the design phase I want to be free to move the all elements around until I am completely sure everything is in the right spot. His beak, feathers and legs are too long and narrow to be able to shift around; so he stayed on paper until it was time to fuse everything on permanently.

Tune in next time, to see if Harry gets glued on!

Ann Fahl

Friday, September 21, 2012

Garden of the Sun God part 2

So here is the unveiling of the border.  I did struggle with possible ideas. At times of indecision like this, I will look back over my earlier quilts for ideas.  If nothing comes to mind, look through the books and magazines I have saved over the years.

For this quilt I finally decided to add an irregularly pieced border, including as many rich red fabrics as I had in my stash.
3 border strips pinned up around the edges.
Then comes the question of what to do with the corners.  Do I use a square in each or do I just continue with the strips?  Hmmmm, I liked the idea of light turquoise in the upper corners to carry out the feeling of "sky." But what do I do for the 2 corners on the lower border?
Borders are attached, the background is complete.
So I compromised.  Two turquoise at the top and I carried the pieced border all the way across the bottom to create a firm foundation for my design elements. If you look closely you will see that the bottom border is actually a little wider than the 2 sides and top.  This is a technique that I always teach in my workshops. When a quilt is meant to hang in one direction such as a landscape or pictorial quilt, make the lower border a little wider.  It isn't obvious, but it adds "visual" weight to the quilt, its purpose is to create a base for the entire composition. This little trick works well. 

The important elements pinned in place.
OK, so you aren't impressed.  But I was pleased at this point in the progression of the design.  I loved my Eqyptian style coneflowers, and the blue and green heads of the papyrus.  To you as the viewer, all the little images are just floating on the background.  But to me, everything seemed to pull together when the drawing of the bird was pinned up. I did have a few moments of indecision, because my original plan was to include 2 or 3 birds in the center. But the birds would have been sized too small to have a family of them in the picture.  As it worked out, I gave up on that idea and included just one much larger bird. It makes a stronger statement this way.

What will happen to Harry the Heron?  More info in my next blog.

Ann Fahl

Tuesday, May 15, 2012

The Back Story of the Purple Iris Quilt and Pattern


Japanese vase made for export, early 1900's
 This quilt came to life during a teaching trip to Empty Spools Seminars at Asilomar two years ago.  I used a mixture of flower shapes so each bud and blossom was different.  There are tight buds, an unfurling flower, and 3 gorgeous flower heads, I love the way the flowers turned out. The shape of the flowers was inspired by an old Japanese vase.  I traced them off, enlarged them, and simplified some areas to make them easier to applique. I used all the rich royal purple fabrics I could find in my stash.  The good thing about the way I work is that I don't need large pieces of fabric for anything except the quilt back. To applique the long iris leaves I used a scalloped programed stitch on my machine that gave the edges a different look than anything I had ever done before.
Finished Purple Iris Quilt
During my workshop, I got all the flowers and leaves cut out and fused onto the background. It made such a beautiful picture that my students suggested that I made it into a pattern. After I finished the applique work, embroidery and quilting, I prepared the directions and pattern pieces. I created a terrific pattern cover and was so pleased with my work. 
The cover of Ann's new pattern
The stumbling block came when I realized the cost of having the pattern sheet printed, it was really expensive.  So I put everything away for awhile.  I pulled it out several times to proof read the direction booklet and check over the pattern pieces, but I didn't know what to do about the high cost of printing the 24 x 36 pattern sheet.  I had never used this large size of paper before. A second time I put it all away, trying to figure out a more economical way to print the large page.  Robbi Joy Eklow suggested I have it printed as a blueprint.  After I checked out several places, I had it printed.  I stuffed a dozen patterns in their ziplock bags and took them with me to Paducah and sold a few copies. 

Oreo demonstrating the proper cat etiquette for quilt sitting
Finally, it is ready for you to check it out, changing the colors will make this quilt your own.  How about red iris on a rich green background?  Or how about yellow flowers on a purple background?  Either of these would create a rich garden atmosphere. This is not a simple pattern, it is for someone with good machine quilting skills. The pattern envelopes are stuffed and ready to go to new homes!  You can check it out on my website.

Since I promised you, the back story, the photo above is showing the back side of the stabilizer and program stitches that I used to applique the long pointed leaves in place.  Isn't it lovely?

Have a wonderful spring.

Ann Fahl

Friday, May 4, 2012

Red Roses of Paducah

Red roses at the IL Artisan Shop at Rend Lake, IL
At the end of my Paducah trip, I headed home on I 57.  One of the highlights of that drive is the Artisan Shop at Rend Lake.  It features the work of IL artists, there was a show of IL quilts and snack buffet for the quilters heading home! Because of my new emphasis on gardening, I have been searching for a new piece of garden art, not a turtle or a gnome, something else.  I found this metal calla lily metal sculpture that just struck my fancy.  By the time I finished purchasing it, I was friends with all the women working there. It was a delightful stop.  

Cally Lily sculpture in its temporary setting.

Let's talk about Paducah. My first evening was a teachers' meeting at the convention center.  I had never seen it without the ratty old adjoining hotel.  Now there is a huge parking lot, it would seem that it could hold thousands of cars before filling up--that is a good thing.

I taught 5 different classes, a rather strenuous schedule, even for me, after teaching for 30 years, it seemed almost overwhelming.  I was surprised at the number of beginners attending the workshops, they had no idea on where to begin.  It is good that there are beginners, because I don't want to see quilting die out, like it did in the 1940-50's.  But it was difficult to teach a wide range of abilities, on vendor machines, in a classroom with 20-25 students. Every class brought a new challenge or two.

Fortunately, I had Janome machines that for the most part caused few problems. On my second and third day, Karen Zimmerman was the Janome educator in my classroom, and she was wonderful.  She had a thorough knowledge of the machines and had a sense of humor that made each subject more fun.

Outside the front door, there were more red roses in front of the convention center.  They were planted downtown, near the river and at the entrance to their beautiful old cemetery. I guess we missed the dogwoods and azaleas because of the warm spring, but it was OK, the roses were colorful and fragrant. The city must have purchased a truckload of these old fashioned rose bushes, they were beautiful.

Another highlight was visiting Caryl Bryer Fallert's studio.  She has been there for about 6 years now, that's how long it has been since I was in Paducah last.  Her work is hung throughout the studio, as well as quilts made by other quilters of note.  I purchased one of her mugs with Corona II: Solar Eclipse on it.  This is my favorite quilt of all time. Many of her famous quilts are available on mugs at her studio/shop. And ......I couldn't leave without purchasing quite a few of her gradated fabrics and faux hand dyed pieces.


On my last full day in Paducah, I visited the Fantastic Fiber exhibit at the Yeiser, and went to the Quilt Museum of the United States.  Both of them were amazing, the exhibits were well presented, relaxing and uncluttered.  Next time you visit this quilt Mecca, make a point of going to both of these places. They are well worth your time. In all, I had a successful teaching trip at Paducah.  It is an honor to be asked to teach there.

I did have two chances to walk through the big show and competition.  Here is a link to the winners, it is a very well edited video put to Mozart. There were some great quilts there, and then there were the rest.  More on this subject at a later time!

Wednesday, April 11, 2012

Ann Becomes Ancient History!

My Great Grandfather, Pascal Kenyon Shaw  1854-1928
This is a day that I never thought would arrive, and it has.  I feel that I must mark this day with a more personal message to you, my readers.  I remember when I was a little girl asking my father, in what year I would be 50 years old.  Fifty was an age that was beyond anything I could possibly comprehend.  I also remember when I was 24 and a good friend of mine was 30, I thought she was ancient!
Ann Fahl, April 11, 2012 a landmark birthday
Today, I can be covered by Medicare and begin receiving Social Security checks.  How could I ever have gotten to this day?  It's mind boggling, how has life gone past so quickly? So in this photo, I am sitting in a pose similar to that of my great grandfather, (but don't you think he was handsome?) but I am certainly having more fun! I'm sitting in front of my newest quilt background, which was pieced today, I'm wearing red socks and shoes.

I've had a lovely day, we had special cookies at coffee this morning, lunch with a friend, it is sunny outside, and tonight we are going out for ice cream. We will have a family celebration with my sons this weekend. But somehow, I feel I should be old today!

On my cutting table, daffodils in a vase by Judy Coates Perez
My studio is cheery and sunny today and my garden is so beautiful.
Doronica, a shade loving plant is blooming much earlier this year.  When all the buds open it will be full of bright flowers.
The May Apples are just about open, even though the temperature got to 28 degrees last night.
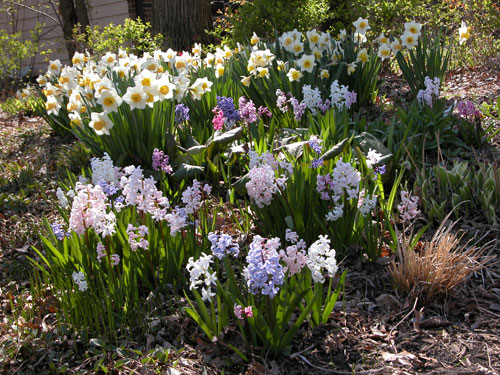
And look at the hyacinths that are blooming in my front yard.
So this is how my life has been today. The daffodils are still beautiful and I have 3 bouquets in the house, they smell heavenly. 

I was 29 years old for many many years.  Five years ago, I had my 30th birthday, and I've been 30 ever since.  But to be really honest, I'm not 30 anymore.  My son is 30!  I should feel very old today. 

I feel so many conflicting feelings, but to be truthful, I don't feel old.  I've just finished a great quilt; starting another, the master gardener classes have been fun and informative, life is good I don't have any compaints.

Yesterday I took my Silver Mist Toyota Camry in for her 90,000 mile checkup. This was an expensive proposition, with new timing belt, serpentine belt, fluid changes, tires rotated and on and on.  When all was completed, I thought Misty and I could ride off into the sunset together! But I've had a change of heart, we are driving to Paducah together instead.  Hope to see you there.

Ann Fahl
Age 30 years.